
If you’re just getting started with woodworking,
building a jewelry box is one of the easiest and
most rewarding projects you can take on.
It’s small, practical, and gives you a chance to practice
essential skills without needing a full workshop.
In this guide, you’ll find simple jewelry box plans that are
beginner-friendly, quick to build,
and easy to customize as your skills improve.
Why Start With A Simple Jewelry Box Plan?
Starting simple helps you build confidence and avoid frustration.
Beginner-friendly jewelry box plans:
- Require fewer tools
- Use basic cuts and joints
- Can be completed in a weekend
- Still look great when finished
The goal isn’t perfection — it’s progress.
Basic Jewelry Box Plan (Step-By-Step)
This is a simple design you can build
with minimal tools and materials.
📏 Dimensions (Example)
- Length: 8–10 inches
- Width: 4–6 inches
- Height: 3–4 inches
Adjust based on your needs.
🪵 Materials
- 1/2″ or 3/4″ wood boards
- Wood glue
- Small hinges
- Sandpaper
- Optional: felt lining
🛠️ Steps
1. Cut Your Pieces
- 2 long side panels
- 2 short side panels
- 1 bottom panel
- 1 lid
Keep cuts straight and consistent.
2. Assemble The Box
- Apply wood glue to edges
- Clamp sides together
- Attach bottom panel
- Let dry fully
3. Sand Smooth
- Start with 120 grit
- Finish with 220 grit
Focus on edges and corners.
4. Attach The Lid
- Align hinges carefully
- Pre-drill holes if needed
- Secure lid evenly
5. Finish The Box
- Apply stain or clear coat
- Let dry completely
💡 Want the full step-by-step walkthrough?
How To Make A Wooden Jewelry Box (Step-by-Step Guide + Plans)
3 Easy Jewelry Box Variations To Try
Once you’ve built the basic version, you can try small upgrades.
🔹 1. Open Compartment Box
- One large interior space
- Fastest and easiest build
- Great for first project
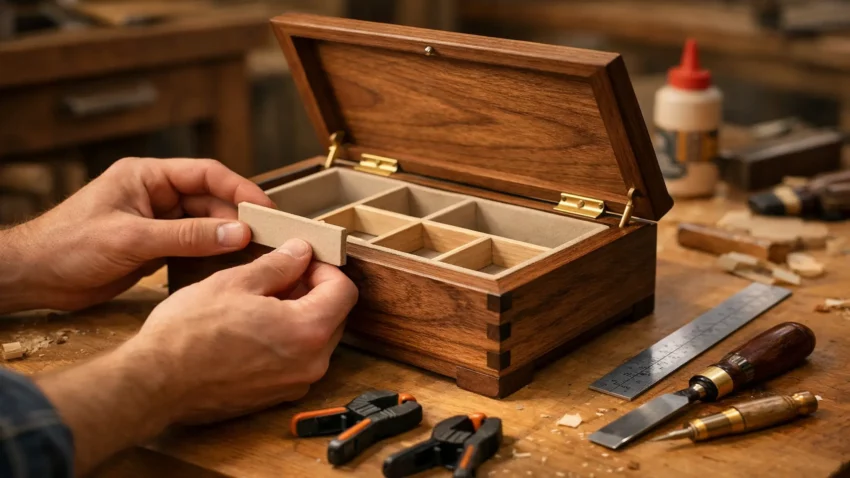
🔹 2. Divider Jewelry Box
- Add a simple center divider
- Helps organize rings or small items
- Slightly more advanced but still beginner-friendly
🔹 3. Sliding Lid Jewelry Box
- No hinges required
- Lid slides into grooves
- Clean, modern look
Tips For Better Results
- Measure twice before cutting
- Don’t rush the sanding process
- Use clamps for tighter joints
- Start simple before adding features
Small improvements make a big difference.
Common Beginner Mistakes
- Cutting pieces unevenly
- Using too much glue
- Misaligning hinges
- Skipping surface prep before finishing
Take your time and focus on clean work.
How To Make Your Jewelry Box Look More Professional
Even a simple build can look high-end with a few upgrades:
- Use better wood (oak, walnut, maple)
- Add felt lining inside
- Install clean, aligned hardware
- Apply an even finish
Learn more here:
👉 Best Wood For Jewelry Boxes (Durability + Appearance Guide)
👉 How To Line A Jewelry Box With Felt (Clean Professional Finish)
Final Thoughts…
Simple jewelry box plans are the perfect starting point for beginners.
You’ll learn the basics, build something useful,
and gain confidence with every step.
Start with a basic design, then improve it as you go.
Each build will come out cleaner, smoother, and more refined than the last.
🔨 Keep Improving Your Jewelry Box Skills
Ready to take your build to the next level?
These guides will help you level up your build:
- 👉 Best Wood For Jewelry Boxes (Choose the right look and durability)
- 👉 How To Line A Jewelry Box With Felt (Clean, professional finish)
- 👉 Jewelry Box Design Ideas (Upgrade your style and layout)
Keep building — each project gets better.
Come on man… You got this!
 Craft it. Shape it. Own it!