

Building a Wood Planter Box is one of those quick weekend wins that makes you feel like a backyard boss.
It doesn’t take fancy tools, a giant workshop, or a master carpenter’s skill set — just a few boards, some screws, and a little bit of sweat.
Before you know it, you’ve got a clean, sturdy planter sitting in your yard, ready to grow tomatoes, peppers, herbs, or whatever green goodness you want to throw in it.
In this guide, I’ll walk you through the whole build step-by-step, drop in a couple of my favorite pro tips, and help you avoid the rookie mistakes that make planter boxes fall apart.
Let’s get to it and build something you’ll be proud to show off.

🌱 Why Build a Wood Planter Box?
A good wood planter box instantly turns any patch of yard, patio, or deck into a clean, organized growing space.
- No digging.
- No fighting terrible soil.
- No wrestling with weeds every other day.
You’re basically creating a little VIP lounge for your plants — all you do is fill it with quality soil and let the garden magic happen.
Planter boxes also give you total control:
Height,
Width,
Depth,
Drainage…
You build it exactly the way you want it.
Whether you’re growing tomatoes, herbs, strawberries, or a small “salad garden,” a sturdy wooden box keeps everything neat, accessible, and looking sharp.
And the best part?
You can build one in an afternoon with basic tools.
Materials & Tools You’ll Need
Before you start cutting boards and slinging screws, gather everything you need so the build goes smooth from start to finish.
A planter box isn’t complicated, but having the right materials on hand makes the job way easier — especially when you’re working solo.
Materials
- Lumber for the sides
(common choices: 1×6, 1×8, or 2×6 boards) - Corner blocks or posts for support
- Exterior wood screws
- Landscape fabric
(optional but helpful for drainage) - Soil or raised-bed mix
- Plants, herbs, or seeds of your choice
Tools
- Tape measure
- Circular saw or jigsaw
- Drill/driver
- Clamps
- Sander
(orbital or hand sanding block) - Carpenter’s square
- Pencil
Recommended Tools to Make This Build Easier
You can build this planter box with basic gear, but a few reliable tools make the whole job smoother, straighter, and a whole lot more enjoyable.
These are the tools that keep your cuts clean, your boards aligned, and your screws going in exactly where they should.
Clamps
Clamps act like a third hand while you’re lining up boards or securing corners before driving screws.
They keep everything square and steady so the box doesn’t shift during assembly.
Jigsaw
A good jigsaw gives you clean, accurate cuts without needing a full table saw setup.
It’s perfect for trimming boards to length, cutting notches, or making quick adjustments on the fly.
Drill/Driver
From pre-drilling corners to driving every screw in the build, your drill is going to do most of the heavy lifting.
A solid drill/driver combo keeps everything tight and makes assembly fast and frustration-free.
IRWIN QUICK-GRIP 6” Mini Bar Clamp Set
Keeping parts aligned while glue sets is key to a sturdy, square bench, and that’s where dependable clamps come in.
The IRWIN QUICK-GRIP 6″ Mini Bar Clamp Set lets you secure pieces quickly with one hand, making assembly smoother, faster, and far less frustrating.
 Amazon Product Suggestion:

 IRWIN QUICK-GRIP
6” Mini Bar Clamp Set
(4-Pack)
These IRWIN Quick-Grip clamps are
my go-to shop workhorses.
Light, fast, and truly one-handed,
they’re perfect for small builds like
display cases, shelves, frames, and trim.
Even with their compact size,
they deliver solid pressure, lock cleanly,
release smooth, and won’t dent your walnut
thanks to the non-marring pads.
If you want clamps you’ll actually enjoy using
— these are the ones.
Why it’s great:
One-handed, easy clamping
Strong, consistent grip
Non-marring pads protect wood
Lightweight and easy to use
SKIL 6-Amp Corded Jig Saw
When your bench design calls for curves, notches, or detailed cutouts, a jigsaw gives you the control a circular saw can’t.
The SKIL 6-Amp Corded Jig Saw makes it easy to handle precision cuts cleanly, helping you shape parts accurately without overcomplicating the build.
Amazon Product Suggestion:
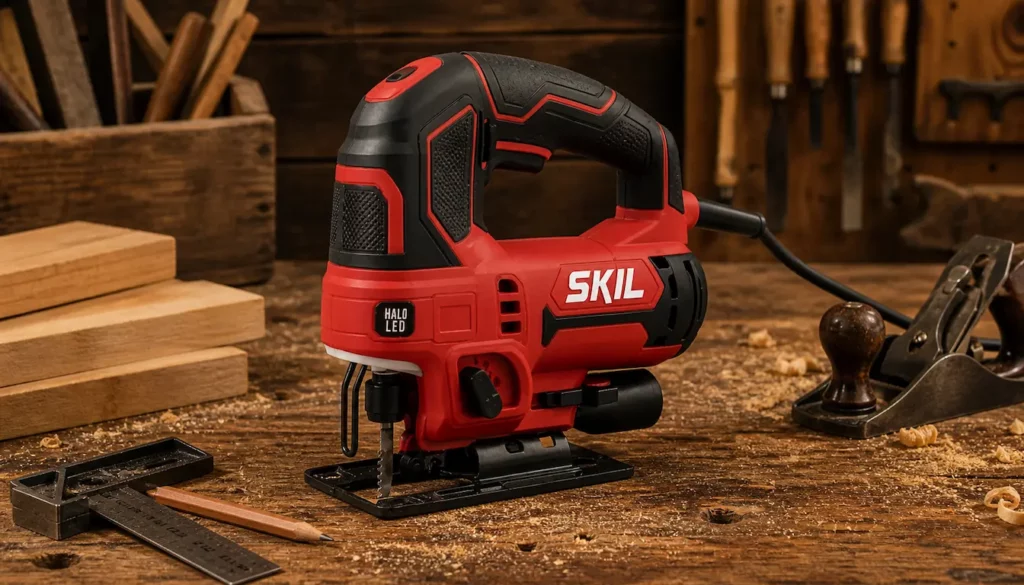
SKIL 6-Amp
Corded Jig Saw
A dependable jigsaw with
solid power and smooth control.
The SKIL 6-Amp delivers
clean curves, fast cuts, and easy
bevel adjustments, making it a great
all-around tool for
woodworking and DIY projects.
Why it’s great:
Powerful 6-amp motor for hardwoods and plywood
4-stage orbital action for smooth or aggressive cutting
Tool-free bevel adjustment for quick angled cuts
Comfortable grip with low vibration for better accuracy
DEWALT 20V Max Cordless Drill
If you want a reliable drill that can handle real projects without slowing you down, this DEWALT kit delivers.
It’s a no-nonsense setup built for beginners and experienced builders alike.
Amazon Product Suggestion:
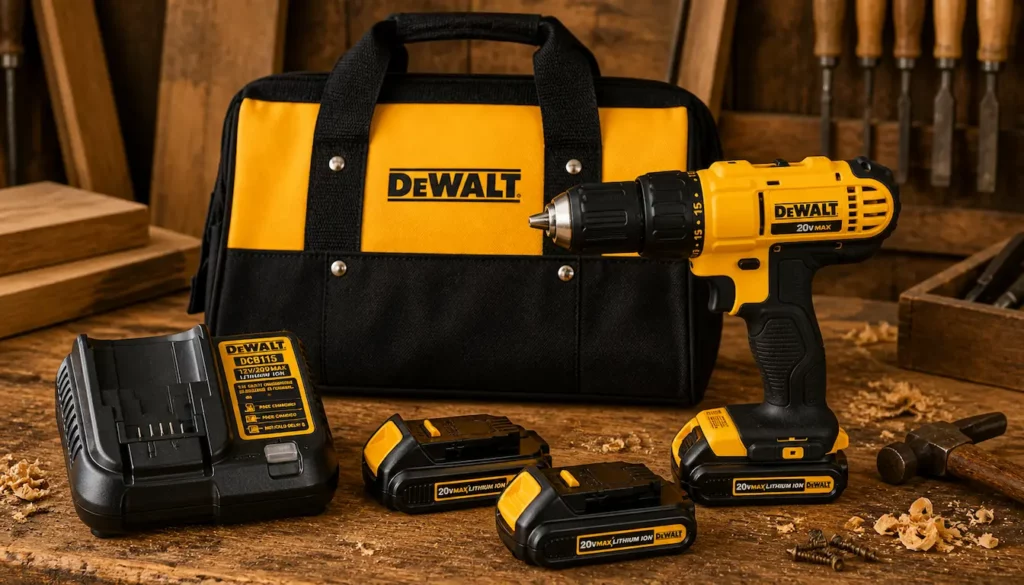
DEWALT 20V Max Cordless Drill
This 20V MAX drill kit comes with
multiple batteries, a charger, and a durable carry bag —
everything you need to get started right away.
It’s lightweight, powerful, and designed for
consistent performance across
a wide range of DIY and workshop tasks.
Why it’s great:
20V MAX power — strong, consistent performance
Two batteries included — less downtime, more work
Compact, lightweight design — easy control and comfort
Complete kit — drill, charger, batteries, and bag included
🪚 Step 1: Cut Your Boards to Size
Start by cutting all your boards to the lengths you want for your planter box.
Most simple boxes use four equal sides, but you can size yours however you want —
long and narrow, square, tall, short…
it’s your garden, so build what fits it best.
Lay out your boards and mark each cut with a sharp pencil and a square so your lines stay straight.
Then grab your jigsaw and make clean, steady cuts, letting the blade do the work.
Don’t force it — smooth cuts mean smoother assembly later.
If you’re building multiple boxes, go ahead and cut all the pieces at once.
It keeps your measurements consistent and saves time when you start putting everything together.
👉👉 Pro Tip:
Use your first perfectly cut board as the template for the rest.
Faster, cleaner, and all your sides match.
🔩 Step 2: Build the Side Panels
Now that your boards are cut, it’s time to assemble the sides of your planter box.
Lay two boards flat on your work surface, line up the edges, and clamp them together so nothing shifts.
This is where those clamps earn their keep — they keep everything steady while you work.
Next, grab your drill and pre-drill along the joint.
This keeps the boards from splitting and gives your screws a straight shot.
Run a few exterior screws through each board to lock the panel together.
Repeat the same process for all four sides.
Once you’ve got your panels built, you’ll see the shape of your planter starting to come together —
and it already feels like a real project.
👉👉 Pro Tip:
Don’t overtighten screws on the panels — it can warp the boards and throw off your corners.
🧱 Step 3: Attach the Corners
With all four side panels built, it’s time to bring this box together.
Stand two panels upright and align the edges to form a clean 90° corner.
Clamp them in place so nothing shifts, then pre-drill and drive screws through the end panel into the adjoining one.
Add your corner blocks or posts inside the corners for extra strength — this keeps the box square and helps it handle the weight of soil later on.
Repeat this on all four corners until your planter box is fully assembled and solid.
👉👉 Pro Tip:
Check each corner with a square before driving screws.
Fixing a crooked planter later is a nightmare.
🪵 Step 4: Add the Bottom (Optional)
If you want your planter box raised off the ground or sitting on a deck, you can add a simple slatted bottom.
Cut a few boards to fit across the base and space them out slightly for drainage.
Set them in place and drive screws into the corner supports to lock everything down.
If you’re placing your planter directly on the ground, you can skip the bottom altogether.
Just line the inside with landscape fabric before adding soil, and you’re good to go.
👉👉 Pro Tip:
Leave small gaps between bottom boards so excess water can drain out and keep your soil from getting soggy.
🌿 Step 5: Line the Inside (Optional but Helpful)
Before you load in the soil, add a layer of landscape fabric inside the planter box.
This helps keep the soil contained, improves drainage, and stops dirt from washing out through the seams over time.
Just cut the fabric to size, press it into the corners, and staple it along the top edges if you want it extra secure.
If you’re planting directly in the ground or using thick boards, you can skip this step — but it does help your planter last longer.
👉👉 Pro Tip:
Let the landscape fabric run a little high and trim it after filling the box — it’s way easier than trying to cut it perfect upfront.
🌱 Step 6: Fill It Up and Start Planting
Now for the fun part.
Add your soil or raised-bed mix and spread it out evenly, making sure it reaches all the corners.
Give the soil a light watering to settle it, then plant your veggies, herbs, or flowers according to the spacing they need.
Once everything’s in the ground, top it off with a little extra soil if needed, and give your plants a good drink to help them settle in.
👉👉 Pro Tip:
Water the soil before planting — it settles the mix and prevents your plants from sinking later.
🌼 Finished Planter Box Project
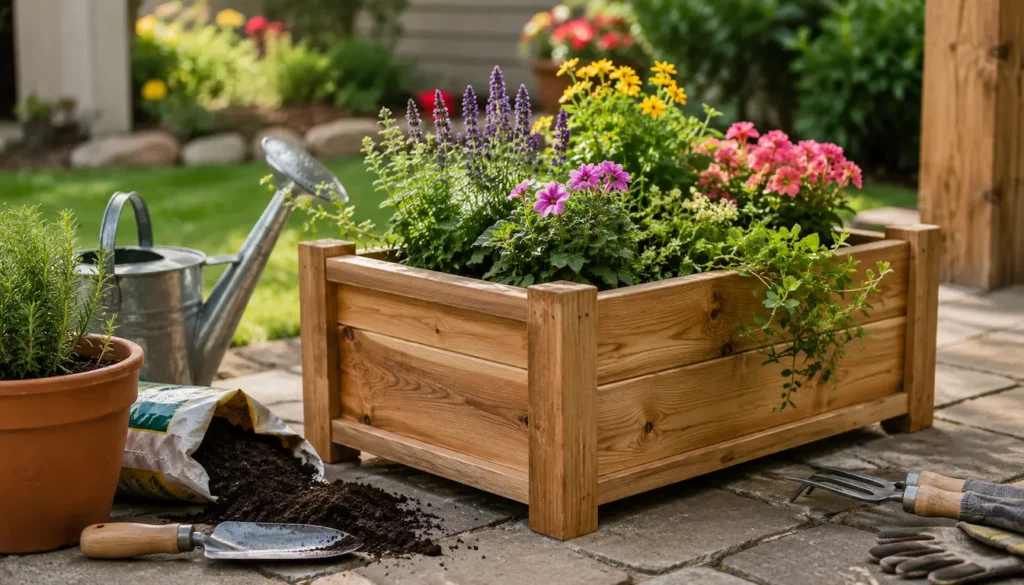
🏁 Final Thoughts…
Building a Wood Planter Box is one of those quick, satisfying projects that pays you back every season.
You end up with a clean, sturdy box that makes planting easier, keeps your garden organized, and looks great in any backyard.
With just a few boards, a drill, a jigsaw, and a little bit of time, you can create something that lasts for years and helps your plants thrive.
Now get out there, throw some soil in that box, and grow something awesome.
 More Builds You’ll Want to Try Next
Ready for the next project?
These builds will sharpen your skills and give you something solid to show for it:
-
How to Build a Wooden Mailbox
– A sturdy outdoor project that teaches clean layout and assembly -
Build a Simple Wooden Toolbox
– A must-have beginner build that keeps your tools organized -
DIY Display Case –
Practice clean joinery with a project that actually looks great -
Craft a Kids’ Stool in 5 Steps
– Quick, simple, and perfect for dialing in your basics
Every project builds skill — the next one is where things start to click.
You got this!
 Craft it. Shape it. Own it!