Building your own wooden jewelry box is one of the most rewarding beginner woodworking projects you can take on.
It’s practical, gift-worthy, and gives you a chance to sharpen your skills without getting overwhelmed.
In this guide, you’ll learn exactly how to build a jewelry box step by step — from choosing the right wood to assembling, finishing, and adding those clean interior touches that make it feel professional.
Whether you’re building your first project or looking for a meaningful handmade gift, this walkthrough will help you get it done right.
And when it’s finished, you’ll have something you can actually use — or give as a gift that means something.
Why Build Your Own Jewelry Box?
There’s something different about making a project that actually gets used every day.
A jewelry box isn’t just a build — it’s:
- A functional piece
you or someone else will use daily - A perfect handmade gift for
birthdays, holidays, or special occasions - A great way to practice
cutting, joining, and finishing techniques
Plus, you can customize it exactly how you want — size, compartments, wood type, and finish.
Tools And Materials You’ll Need
🛠️ Basic Tools
- Measuring tape
- Pencil
- Circular saw or table saw
- Sandpaper (120, 180, 220 grit)
- Wood glue
- Clamps
- Drill (optional for hinges)
🪵 Materials
- Wood boards
(pine, cedar, or hardwoods like oak or walnut) - Small hinges
- Wood screws or nails
- Wood stain or finish
- Felt
(optional for lining)
💡 Keep it simple if you’re a beginner — this project doesn’t require a full shop.
Step 1: Choose The Right Wood
The type of wood you choose affects both the look and durability of your jewelry box.
- Pine – Easy to work with and budget-friendly
- Cedar – Naturally aromatic and great for storage
- Oak / Walnut / Maple – Stronger and more premium look
👉 If you want a deeper breakdown:
Best Wood For Jewelry Boxes (Durability + Appearance Guide)
Step 2: Plan Your Jewelry Box Size And Layout
Before cutting anything, decide:
- Overall size of the box
- Number of compartments
- Lid style (flat or hinged)
Keep your first build simple:
- One large compartment
- Optional divider later
👉 Need beginner-friendly layouts?
Easy Jewelry Box Plans For Beginners (Simple DIY Builds)
Step 3: Cut Your Wood Pieces
You’ll typically need:
- 4 side panels
- 1 bottom panel
- 1 lid
Take your time here — clean cuts make everything easier later.
💡 Tip: Measure twice, cut once (always).
Step 4: Assemble The Box
- Apply wood glue to the edges
- Clamp the sides together
- Attach the bottom panel
- Let everything dry fully
You can reinforce with nails or screws if needed, but glue alone is often enough for small builds.
Step 5: Sand Everything Smooth
Start with 120 grit → move to 220 grit.
Focus on:
- Edges
- Corners
- Lid surface
This is what separates a rough project from a clean one.
Step 6: Attach The Lid
Using small hinges:
- Align carefully
- Pre-drill holes if needed
- Attach lid slowly and evenly
Make sure it opens and closes smoothly before moving on.
Step 7: Apply Finish Or Stain
This is where your box really comes to life.
Options:
- Natural clear coat
- Dark stain for a rich look
- Light stain for a softer finish
Apply evenly and let it dry completely.
Step 8: Add Interior Lining (Optional But Worth It)
Lining your jewelry box adds a professional touch and protects delicate items.
- Cut felt to size
- Apply adhesive evenly
- Press into place carefully
👉 Step-by-step guide here:
How To Line A Jewelry Box With Felt (Clean Professional Finish)
Step 9: Customize Your Design
Now that you’ve built the basics, you can take it further:
- Add dividers
- Create ring slots
- Try different lid styles
- Use decorative hardware
👉 Get ideas here:
DIY Jewelry Box Design Ideas (Simple To Advanced Styles)
Common Mistakes To Avoid
- Rushing measurements
- Skipping sanding
- Using too much glue
- Misaligning hinges
Take your time — this project rewards patience.
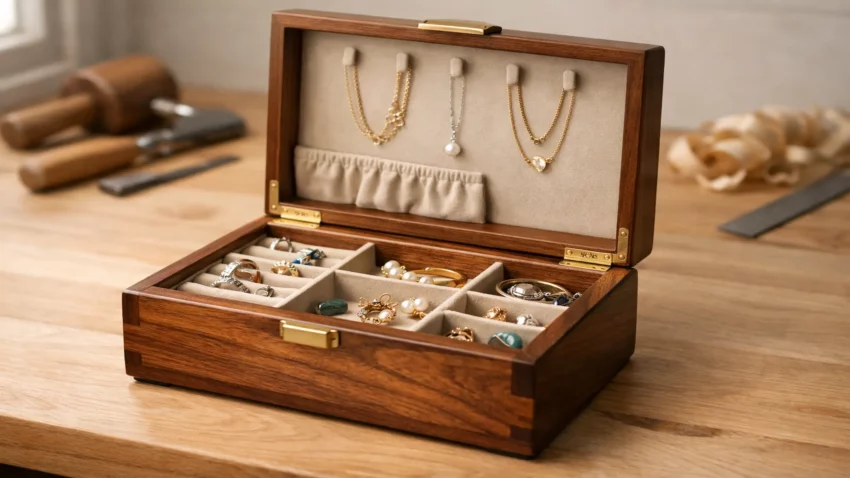
💎 Finished Wooden Jewelry Box

🏁 Final Thoughts…
Building a wooden jewelry box is one of the best beginner projects you can tackle.
It teaches essential skills while giving you something meaningful at the end.
Start simple, focus on clean cuts and smooth finishes, and improve with each build.
Before long, you won’t just be making one — you’ll be building better versions every time.
🔨 Keep Building Your Jewelry Box Skills
If you want to take your jewelry box from basic to next-level,
these guides will help you dial it in:
- 👉 Best Wood For Jewelry Boxes (Choose the right look and durability)
- 👉 Easy Jewelry Box Plans (Simple builds you can finish fast)
- 👉 How To Line A Jewelry Box With Felt (Clean, professional finish)
- 👉 Jewelry Box Design Ideas (Upgrade your style and layout)
- 👉 Recommended tools and materials for this build
Keep building, keep improving — each project gets better.
 More Builds You’ll Want to Try Next
Ready for the next project?
These builds will sharpen your skills and give you something solid to show for it:
-
How to Build a Wooden Mailbox
– A sturdy outdoor project that teaches clean layout and assembly -
Build a Simple Wooden Toolbox
– A must-have beginner build that keeps your tools organized -
DIY Display Case –
Practice clean joinery with a project that actually looks great -
Craft a Kids’ Stool in 5 Steps
– Quick, simple, and perfect for dialing in your basics
Every project builds skill — the next one is where things start to click.
 Craft it. Shape it. Own it!