
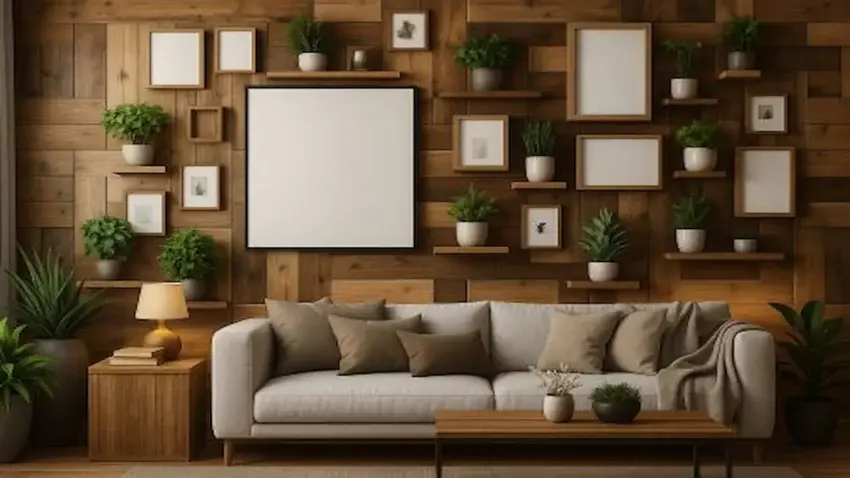
A Custom Wood Accent Wall is one of those projects that can completely transform a plain room into a warm, textured focal point.
Whether you’re aiming for rustic cabin charm, modern geometric patterns, or something uniquely your own, this project delivers a dramatic visual impact without requiring a full remodel.
With a few basic tools, the right materials, and a little creativity, you can build a feature wall that makes your space feel handcrafted and intentional — the kind of upgrade that has guests asking:
“Wait… you built that?”
👉 Looking for more ways to transform your walls?
Check out our DIY Wood Wall Projects for creative ideas, beginner-friendly tutorials, and inspiration to help you personalize every room in your home.

🌿 Why Build a Custom Wood Accent Wall?
A wood accent wall does more than just look good — it completely changes the feel of a room.
Wood adds warmth, depth, and character in a way that paint or wallpaper simply can’t match.
Whether you prefer clean horizontal planks, bold geometric patterns, or a mix of natural wood tones, the design possibilities are almost endless.
Whether you’re cozying up a living room, adding personality to a bedroom, or creating a striking fireplace or TV feature wall, an accent wall is one of the easiest ways to make a space feel thoughtfully designed.
And because you’re building it yourself, you can customize every detail — from board widths and layouts to stain colors and finishes — to match your style.
🧰 Tools & Materials You’ll Need
Before you start putting boards on the wall, take a few minutes to gather everything you’ll need.
A wood accent wall goes together much more smoothly when your tools are ready and your materials are prepped.
Here’s what most DIYers use to build a clean, professional-looking accent wall:
Tools
-
Tape measure
-
Level or laser level
-
Stud finder
-
Jigsaw or miter saw (for cutting boards to length)
-
Drill/driver
-
Clamps
-
Brad Nailer (optional but a huge time-saver)
-
Sander
-
Pencil & speed square
Materials
-
Wood boards
(pine, cedar, reclaimed wood, shiplap, pallet wood, or your preferred style) -
Construction adhesive or wood glue
-
Brad nails or trim screws
-
Sandpaper
-
Wood stain or protective finish (optional)
-
Painter’s tape
-
Wall anchors
(only if you’re installing shelves or other mounted accessories)
🛠️ Recommended Tools to Make This Project Easier
You can build a beautiful wood accent wall with basic tools, but the right equipment makes the project go much more smoothly.
These three tools help you measure accurately, make cleaner cuts, and keep everything securely in place while you work.
Whether you’re installing a simple shiplap wall or creating a custom geometric design, these are the tools I’d recommend to make the job easier from start to finish.
IRWIN QUICK-GRIP 6” Mini Bar Clamp Set
Mini bar clamps act like an extra pair of hands, holding small pieces securely while glue dries or delicate inlay work is completed.
Their one-handed design makes it easy to apply steady pressure without shifting your project.
🌟 Amazon Product Suggestion:

✔️ IRWIN QUICK-GRIP 6” One-Handed Mini Bar Clamp Set
(4-Pack)
These IRWIN Quick-Grip mini bar clamps make it
easy to hold small parts securely while you work.
Their one-handed design and non-marring pads are perfect
for delicate woodworking, inlay, and glue-ups.
Why it’s great:
✓ One-handed operation — fast and easy to use.
✓ Strong clamping pressure — holds parts securely.
✓ Non-marring pads — protects finished wood.
✓ Perfect for small projects — ideal for inlay and glue-ups.
SKIL 6-Amp Corded Jig Saw
A jigsaw is one of the easiest tools for cutting curves, templates, and decorative shapes in wood.
It’s a great choice for beginners because it’s versatile, easy to control, and handles everything from rough cuts to detailed projects.
🌟 Amazon Product Suggestion:
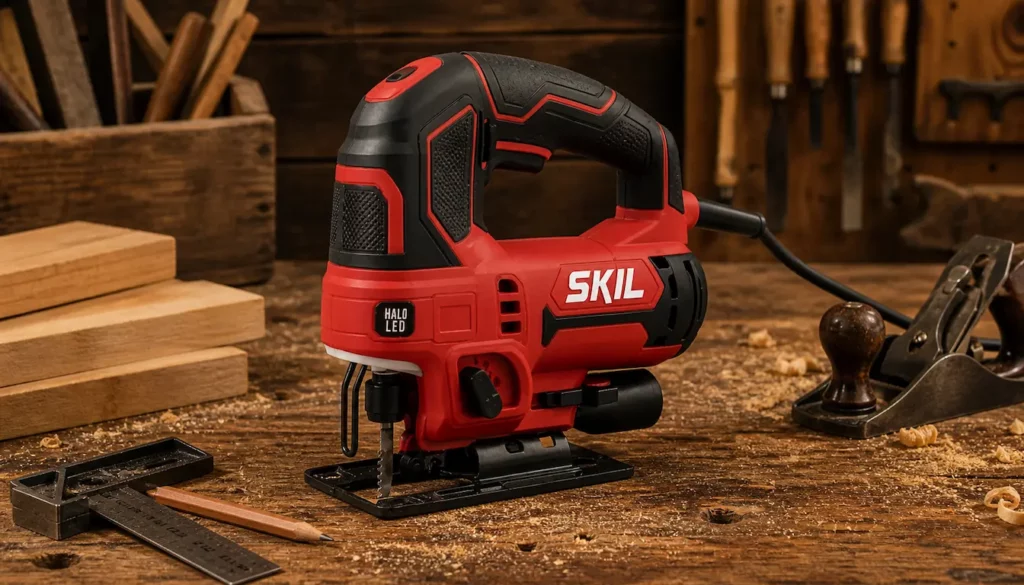
✔ SKIL 6-Amp Corded Jig Saw
A reliable jigsaw that makes cutting
curves, templates, and detailed shapes easy.
Its smooth performance and adjustable settings make it a
great choice for beginners and experienced woodworkers alike.
Why it’s great:
✓ Powerful 6-amp motor — smooth, reliable cutting.
✓ 4-stage orbital action — matches different cutting jobs.
✓ Built-in HALO LED — improves cut-line visibility.
✓ Tool-free bevel adjustment — quick angled cuts.
DEWALT 20V Max Cordless Drill
A cordless drill is one of the most useful tools you’ll own, handling everything from drilling pilot holes to driving screws with ease.
This DEWALT 20V Max model delivers the power, comfort, and battery life needed for woodworking projects of all sizes.
🌟 Amazon Product Suggestion:

 DEWALT 20V Max Cordless Drill
This DEWALT 20V Max drill is a dependable choice
for drilling, driving screws, and everyday woodworking.
Its lightweight design and long-lasting battery
make it easy to tackle projects with confidence.
Why it’s great:
✓ Powerful 20V motor — handles tough jobs.
✓ Two-speed transmission — added control and versatility.
✓ Lightweight design — comfortable for extended use.
✓ Includes batteries and charger — ready to work out of the box.
🔨 How to Build Your Custom Wood Accent Wall
Now that you’ve gathered your tools, materials, and a few recommended upgrades, it’s time to start building.
This is a beginner-friendly project, and with a little patience during the layout and prep work, you’ll end up with a wall that looks clean, straight, and professionally installed.
🪜 Step 1: Prep and Inspect the Wall
Before you install a single board, make sure you’re starting with a clean, solid surface.
Remove outlet covers, artwork, shelves, nails, and anything else attached to the wall.
Then wipe the surface down to remove dust, dirt, and oils that could affect adhesion.
Next, use a stud finder to locate and mark each stud with a pencil.
These marks will help you place brad nails or screws where they’ll provide the strongest support.
Once everything is marked, step back and inspect the wall.
Fill any dents or holes, sand down high spots if needed, and make sure the surface is as flat as possible.
The smoother your starting point, the easier it will be to keep your boards aligned and your finished wall looking its best.
👉 Pro Tip: Use blue painter’s tape instead of a pencil to mark stud locations.
It’s easier to spot from across the room, won’t smudge while you’re working, and peels away clean when the project is finished.
Step 2: Plan Your Layout
Before you grab the nailer, take a few minutes to decide how you want your accent wall to look.
Lay a few boards on the floor to experiment with the pattern, wood tones, and spacing before anything goes on the wall.
Whether you’re installing horizontal planks, vertical boards, or a custom geometric design, a little planning now can save you a lot of frustration later.
Next, use a level or laser level to snap a perfectly straight reference line across the wall.
This line becomes your guide for the entire installation, helping keep every board straight — even if your floor or ceiling isn’t perfectly level.
A level first row is the key to an accent wall that looks clean and professionally installed.
👉 Pro Tip: Mix board lengths, widths, and wood tones for a more natural, handcrafted look.
Repeating the exact same pattern across the entire wall can make it feel too manufactured.
Step 3: Cut Your Boards to Size
Once you’ve finalized your layout, it’s time to start cutting your boards.
Use a jigsaw or miter saw to trim each piece to length, taking your time to make clean, square cuts.
Consistent cuts make installation much easier and help the finished wall look straight and professional.
As you work, dry-fit a few boards before fastening them in place.
This helps you fine-tune the pattern, avoid awkward gaps, and make sure the board lengths flow naturally from one row to the next.
👉 Pro Tip: Cut and stage enough boards for two or three rows at a time instead of preparing the entire wall at once.
It keeps your layout flexible and makes it much easier to adjust the pattern as you go.
Step 4: Install the First Row
Your first row sets the foundation for the entire accent wall, so take your time and get it right.
Position the first board along the level reference line you marked earlier, making sure it’s perfectly straight before fastening it in place.
Apply construction adhesive to the back of the board, then secure it with brad nails or trim screws driven into the studs you marked during prep.
As you work across the wall, check your level every few boards to make sure everything stays aligned.
If the first row is straight, the rest of the installation becomes much easier.
If it’s off, every row above it will show the mistake.
👉 Pro Tip: Start your first row with a full-length board whenever possible.
It creates a cleaner, more balanced appearance and helps the entire wall look professionally installed.
Step 5: Keep Building the Pattern
With the first row in place, continue installing your boards one row at a time.
Stagger the seams, vary your board lengths, and follow the layout you planned earlier to create a balanced, natural-looking pattern.
As you work across the wall, check your level every few boards.
Small shifts are easy to correct early, but they become much more noticeable as the installation progresses.
When you reach outlets, corners, or trim, measure carefully and make your cuts slowly.
Taking a little extra time around these areas is what separates a good-looking accent wall from one that looks professionally built.
👉 Pro Tip: Every couple of rows, step back and look at the wall from across the room.
It’s much easier to spot repeating patterns, uneven spacing, or crooked lines before the entire wall is finished.
Step 6: Sand and Finish (Optional but Recommended)
Once the wall is fully installed, run your hand across a few boards and inspect the surface closely.
If you notice rough edges, raised grain, or slight transitions between boards, smooth those areas with fine-grit sandpaper.
You don’t need to sand the entire wall — just touch up any spots that catch your hand or stand out in the light.
If you’d like to stain or seal the wood, now’s the time.
A satin or matte finish enhances the natural grain while helping protect the wood from fingerprints, dust, and everyday wear.
Before applying any finish, wipe the boards clean to remove sanding dust.
👉 Pro Tip: Use a sanding sponge instead of a power sander for small touch-ups.
It gives you better control, is less likely to scuff surrounding boards, and makes it easier to blend small imperfections.
Step 7: Reinstall Fixtures and Add Final Touches
Once your wall is sanded, finished, and completely dry, it’s time to bring the room back together.
Reinstall outlet covers, light switches, wall plates, and any trim you removed during the project.
If you’re adding shelves, hooks, or décor, make sure they’re secured to wall studs or appropriate heavy-duty anchors for a safe, long-lasting installation.
Now step back and admire what you’ve built.
A custom wood accent wall can completely transform a room, and there’s something especially satisfying about knowing you created it yourself.
That’s the good stuff right there.
👉 Pro Tip: Before you cover your stud marks, take a few photos showing their locations.
If you decide to hang a TV, shelves, or artwork later, you’ll know exactly where the studs are without guessing.
🏁 Final Thoughts…
Building a Custom Wood Accent Wall is one of those projects that delivers a big visual impact without requiring a massive budget or advanced carpentry skills. With careful planning, a few reliable tools, and a little creativity, you can transform an ordinary room into a warm, handcrafted space that feels welcoming and uniquely yours.
Take your time with the first row, keep your layout flexible, and step back often to check your progress.
Small details — clean cuts, balanced board spacing, and a consistent finish—are what make the difference between a good accent wall and one that truly stands out.
And now that you’ve built one?
You’ve added a skill you’ll use again and again, whether it’s another accent wall, built-in shelving, or your next woodworking project.
If this wall doesn’t make you feel like you’ve accomplished something, nothing will.
 More Builds You’ll Want to Try Next
Ready for the next project?
These builds will sharpen your skills and give you something solid to show for it:
-
How to Build a Wooden Mailbox – A sturdy outdoor project that teaches clean layout and assembly
-
Build a Simple Wooden Toolbox – A must-have beginner build that keeps your tools organized
-
DIY Display Case – Practice clean joinery with a project that actually looks great
-
Craft a Kids’ Stool in 5 Steps – Quick, simple, and perfect for dialing in your basics
Every project builds skill — the next one is where things start to click.
Come on man… You got this!
 Craft it. Shape it. Own it!