

Looking to add something functional and good-looking to your home or backyard?
DIY Wooden Bench for Indoor or Outdoor Use is a simple, rewarding project that blends durability, versatility, and classic style.
Whether it’s placed on a front porch, along a garden path, or inside an entryway or mudroom, a solid wood bench delivers practical seating and timeless appeal without unnecessary complexity.
In this guide, you’ll learn how to build a classic wooden bench with a clean design that works beautifully both indoors and outdoors.
We’ll cover everything from choosing materials and tools to step-by-step build instructions, customization ideas, and pro tips to make sure your bench stays strong and looks great in any setting.

🧰 Tools and Materials
Before you start cutting and assembling your bench, it helps to have a small lineup of dependable tools ready to go.
These picks cover accurate measuring, secure clamping, drilling and driving, clean cuts, and smooth finishing.
Everything you need to build a sturdy wooden bench with confidence and consistent results.
STANLEY FATMAX 25-Foot Tape Measure
Accurate measurements are the foundation of a solid bench build, and having a reliable tape measure makes every cut more confident.
The STANLEY FATMAX 25-Foot Tape Measure is tough, easy to read, and built to handle both indoor projects and outdoor jobsite conditions without skipping a beat.
 Amazon Product Suggestion:

 STANLEY FATMAX 25-Foot Tape Measure
A tough, reliable tape measure built for real job-site use. The STANLEY FATMAX 25′ delivers crisp easy-read markings, a strong standout, and the perfect length for woodworking and outdoor projects.
Why it’s great:
✔️ Heavy-duty, long-lasting construction
✔️ Easy-read numbers for quick measuring
✔️ 25-foot length covers most indoor and outdoor projects
✔️ Smooth standout for measuring long boards without assistance
IRWIN QUICK-GRIP 6” One-Handed Mini Bar Clamp Set
Keeping parts aligned while glue sets is key to a sturdy, square bench, and that’s where dependable clamps come in.
The IRWIN QUICK-GRIP 6″ One-Handed Mini Bar Clamp Set lets you secure pieces quickly with one hand, making assembly smoother, faster, and far less frustrating.
Amazon Product Suggestion:

IRWIN QUICK-GRIP 6” One-Handed Mini Bar Clamp Set
(4-Pack)
These IRWIN Quick-Grip clamps are my go-to shop workhorses. Light, fast, and truly one-handed, they’re perfect for small builds like display cases, shelves, frames, and trim. Even with their compact size, they deliver solid pressure, lock cleanly, release smooth, and won’t dent your walnut thanks to the non-marring pads. If you want clamps you’ll actually enjoy using — these are the ones.
Why it’s great:
✔️ One-handed operation makes positioning and clamping effortless
✔️ Strong, consistent grip for small woodworking and assembly projects
✔️ Soft, non-marring pads protect delicate woods like walnut and cherry
✔️ Lightweight design lets you use several clamps at once without fatigue
DEWALT 20V Max Cordless Drill
From drilling clean pilot holes to driving screws during assembly, a dependable cordless drill is a must-have for this project.
This drill delivers plenty of power, solid battery life, and the versatility needed to move smoothly from framing to final assembly without slowing you down.
Amazon Product Suggestion:

DEWALT 20V Max Cordless Drill
This 20V MAX drill kit comes with
multiple batteries, a charger, and a durable carry bag —
everything you need to get started right away.
It’s lightweight, powerful, and designed for
consistent performance across
a wide range of DIY and workshop tasks.
Why it’s great:
20V MAX power — strong, consistent performance
Two batteries included — less downtime, more work
Compact, lightweight design — easy control and comfort
Complete kit — drill, charger, batteries, and bag included
SKIL 5” Random Orbital Sander
Smooth surfaces make all the difference in how a finished bench looks and feels, especially when it’s meant for everyday use.
The SKIL 5″ Random Orbital Sander helps you quickly remove rough spots and tool marks while its cyclonic dust box keeps cleanup manageable and your workspace cleaner.
Amazon Product Suggestion:
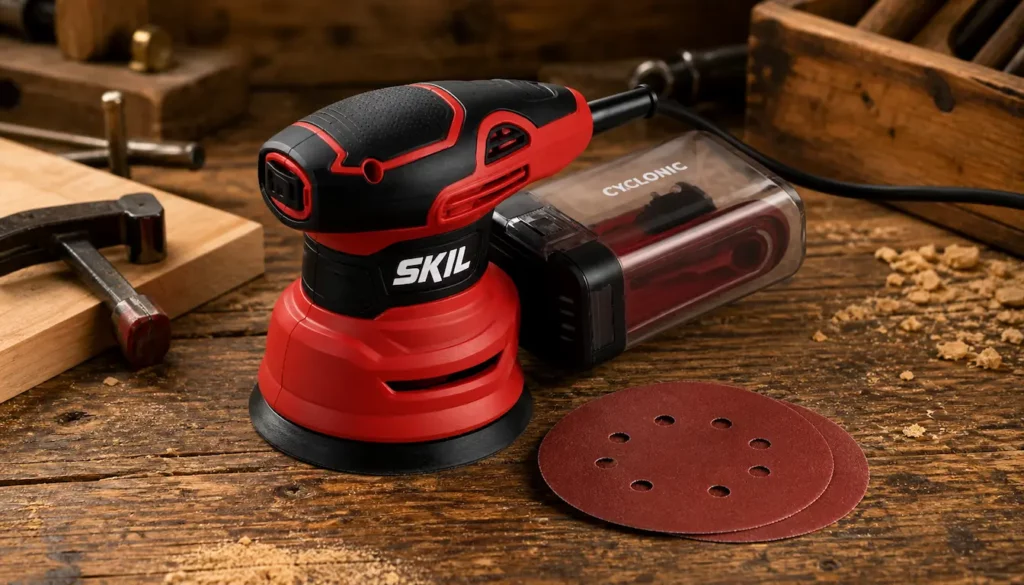
SKIL 5” Random Orbital Sander
(with Cyclonic Dust Box)
This SKIL 5” random-orbital sander is a killer little powerhouse — perfect for smoothing out your walnut display case, taking down glue squeeze-out, or prepping panels before finishing.
It’s compact, strong, and stupid-easy to control.
The built-in cyclonic dust box actually works (rare for budget sanders),
keeping the air cleaner while you work.
Why it’s great:
✔️ Random-orbit finish for smooth, swirl-free sanding
✔️ Cyclonic dust box that actually traps dust
✔️ Variable speed for precise control on any wood
✔️ Low vibration for accuracy and less fatigue
SKIL 15-Amp 7-1/4″ Circular Saw
Clean, straight cuts are essential for a bench that goes together square and strong.
The SKIL 15-Amp 7-1/4″ Circular Saw provides the power and control needed to break down lumber accurately, making it easier to achieve tight joints and a professional-looking result.
Amazon Product Suggestion:

SKIL 15-Amp 7-1/4″ Circular Saw
(5280-01)
This SKIL saw is a solid, no-nonsense workhorse for cutting lumber.
The 15-amp motor gives you smooth, confident cuts, and the built-in laser helps keep your lines straight. It’s lightweight, easy to handle, and perfect for breaking down boards for a project like this porch bench.
Why It’s Great:
✔️ Strong 15-amp motor for cutting hardwoods and thick stock
✔️ Laser guide helps keep cuts straight and accurate
✔️ Lightweight and beginner-friendly design
✔️ Great for both rip cuts and crosscuts
🛠 Other Tools That Will Make This Job Go Smoothly:
- Carpenter’s square
- Pocket hole jig (optional but recommended)
- Safety gear (glasses, mask)
🪵 Materials:
- (3) 2×4 x 8’ boards (for top and frame)
- (2) 2×6 x 8’ boards (for legs)
- 2½” wood screws or pocket hole screws
- Wood glue
- Outdoor wood stain or paint (for outdoor use)
- Polyurethane or exterior sealant
📐 Finished Dimensions
Size (standard):
- Length: 48″
- Width: 14½”
- Height: 18″
This bench comfortably seats two adults and fits well in entryways, dining tables, patios, or porches.
Want something shorter or longer? Just adjust the top and stretcher lengths accordingly.
🔨 Step-by-Step Instructions
✅ Step 1: Cut Your Lumber
Using a circular saw or miter saw, cut the following pieces:
- Seat Top:
- (3) 2x4s at 48″ long (side by side will form the top surface)
- Legs:
- (4) 2x6s at 17½” long
- End Support Rails:
- (2) 2x4s at 11″ long
- Long Stretchers (side rails):
- (2) 2x4s at 41″ long
These measurements leave room for the top boards to overhang slightly on each end.
✅ Step 2: Build the Leg Assemblies
Each leg assembly consists of two 2×6 boards (one vertical leg and one horizontal foot) joined in an L-shape. This classic design offers excellent stability.
- Attach the vertical 2×6 (leg) to the horizontal 2×6 (foot) using wood glue and screws.
- Use clamps and a square to make sure the joint is perfectly square.
- Repeat for the second leg.
 Pro Tip: Drill pilot holes to prevent splitting, and make sure screws are countersunk for a clean look.
✅ Step 3: Add End Supports
The end support rails connect the two leg assemblies together.
- Position one 2×4 end support rail between the two legs, 3” from the ground, and secure with screws.
- Place the second rail at the top between the two legs, flush with the tops of the 2x6s.
- Secure with wood glue and screws or pocket hole joinery for extra strength.
Now you have a rigid bench base with two legs and horizontal support between them.
✅ Step 4: Attach the Side Stretchers
The side rails (or stretchers) add stability and prevent wobbling when sitting.
- Run the 41″ 2×4 boards between the tops of the leg assemblies, long ways.
- Secure with screws or pocket holes at each end.
- Use clamps to pull everything tight and ensure your frame is square.
At this point, you’ve got a strong rectangular bench frame that’s ready for the top.
✅ Step 5: Install the Bench Top
- Lay your (3) 2×4 seat boards side by side across the top of the frame.
- Adjust them so there’s a slight gap between each board (about ⅛”) for water drainage if placing outdoors.
- Center the boards so they overhang evenly on all sides.
- Secure with screws through the top into the side rails.
Pro Tip: Sand edges of top boards with a round-over bit or sandpaper for comfort and style.
✅ Step 6: Sand and Finish
Once assembled, it’s time to prep for the finish.
- Sand all surfaces smooth, paying extra attention to corners, edges, and any rough ends.
- Start with 80-grit and work up to 150- or 220-grit.
- Wipe down with a tack cloth or damp rag.
🌦️ Outdoor vs. Indoor Finishing
If using your bench indoors:
- Apply wood stain or leave natural
- Finish with 2–3 coats of polyurethane for protection
If placing your bench outdoors:
- Use an exterior wood stain or paint
- Seal with marine spar urethane or another UV- and weather-resistant finish
- Reapply annually for long-term durability
Pro Tip: For wet climates, consider using cedar or pressure-treated lumber.
🎨 Customization Ideas
Want to take your bench to the next level? Try these enhancements:
- 🔸 Add a shelf underneath for shoes or baskets
- 🔸 Use reclaimed barn wood for a rustic look
- 🔸 Burn the wood with a propane torch for a “shou sugi ban” finish
- 🔸 Add decorative brackets or trim for a refined, indoor look
- 🔸 Paint the legs and stain the top for a two-tone farmhouse style
This bench is a blank canvas — feel free to match it to your space and personality.
🧠 Tips for a Successful Build
- Use quality lumber — warped boards make for uneven seats
- Double-check all joints are square before screwing
- Use clamps liberally during assembly
- When in doubt, pilot holes will prevent split wood
- Don’t overtighten screws — tight is good, stripped is not
🪑 Where to Use Your Bench
This simple design fits seamlessly in nearly every room or outdoor area:
- ✅ Entryway or mudroom: Sit while taking off shoes
- ✅ Dining table seating: Pair with a matching table
- ✅ Porch or patio: Add potted plants and cushions
- ✅ Bedroom: Place at the foot of the bed
- ✅ Garden path: A shady spot to sit and relax
It’s also strong enough for occasional extra guests or even light shop use.
 Rustic Wooden Bench for Porch, Patio, or Garden

🏁 Final Thoughts…
A wooden bench is one of the most versatile, beginner-friendly projects you can tackle.
With just a few boards and basic tools, you’ll build something that’s beautiful, durable, and useful in any space.
Best of all, it’s completely customizable — whether you like your furniture rustic, modern, farmhouse, or industrial. Build one now, and you might find yourself building a second before the week’s out!
 More Builds You’ll Want to Try Next
Ready for the next project?
These builds will sharpen your skills and give you something solid to show for it:
-
How to Build a Wooden Mailbox
– A sturdy outdoor project that teaches clean layout and assembly -
Build a Simple Wooden Toolbox
– A must-have beginner build that keeps your tools organized -
DIY Display Case –
Practice clean joinery with a project that actually looks great -
Craft a Kids’ Stool in 5 Steps
– Quick, simple, and perfect for dialing in your basics
Every project builds skill — the next one is where things start to click.
You got this!
Craft it. Shape it. Own it!