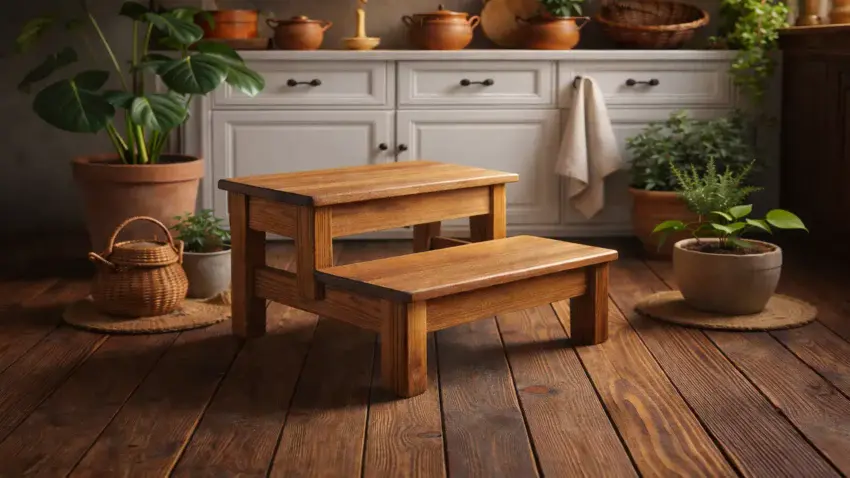
Building a kid’s step stool is one of those
woodworking projects that delivers quick wins and real usefulness.
Learning how to craft a kid’s stool in 5 steps
keeps the process simple, safe, and beginner-friendly
while still producing a sturdy piece you’ll actually use.
With the right wood, basic tools, and a straightforward plan,
this is a project that builds confidence as much as it builds furniture.

🔧 Tool Needed For This Project
To craft a kid’s stool safely and accurately, you don’t need a shop full of expensive tools —
Just a few reliable basics that make measuring, cutting, fastening, and sanding straightforward.
These are the tools I reach for on small furniture projects like this one because they’re easy to use, beginner-friendly, and get the job done without overcomplicating the build.
📏 STANLEY FATMAX 25-Foot Tape Measure
Accurate measurements are the foundation of any solid build,
especially when making something meant for kids.
A dependable tape measure like the STANLEY FATMAX makes it easy to lay out cuts,
check spacing, and keep everything square from start to finish.
 Amazon Product Suggestion:

 STANLEY FATMAX 25-Foot Tape Measure
A tough, reliable tape measure built for real job-site use. The STANLEY FATMAX 25′ delivers crisp easy-read markings, a strong standout, and the perfect length for woodworking and outdoor projects.
Why it’s great:
Heavy-duty, long-lasting construction
Easy-read numbers for quick measuring
25-foot length covers indoor and outdoor builds
Smooth standout for measuring long boards solo
Trusted brand with thousands of great reviews
🗜️ IRWIN QUICK-GRIP 6” One-Handed Mini Bar Clamp Set (4-Pack)
Clamps act like extra hands during assembly, holding parts steady while you drill or fasten.
These one-handed IRWIN QUICK-GRIP clamps are perfect for small projects like a step stool,
making it easier to keep joints aligned without fighting the workpiece.
Amazon Product Suggestion:
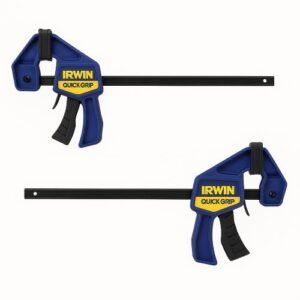
IRWIN QUICK-GRIP 6” One-Handed Mini Bar Clamp Set
(4-Pack)
These IRWIN Quick-Grip clamps are my go-to shop workhorses. Light, fast, and truly one-handed, they’re perfect for small builds like display cases, shelves, frames, and trim. Even with their compact size, they deliver solid pressure, lock cleanly, release smooth, and won’t dent your walnut thanks to the non-marring pads. If you want clamps you’ll actually enjoy using — these are the ones.
Why it’s great:
One-handed operation makes positioning and clamping effortless
Strong, consistent grip for small cabinet and display case build
Soft, non-marring pads protect delicate woods like walnut and cherry
Lightweight design lets you run several clamps at once without fatigue
Perfect for tight spots where full-size bar clamps won’t fit
Extremely reliable — no slipping, no bending, no cheap-plastic flex
Great for beginners and pros who want fast, frustration-free clamping
🔩 INSPIRITECH 20V Cordless Drill (My Personal Choice!)
A cordless drill is essential for pre-drilling holes and driving screws cleanly.
This 20V cordless drill offers plenty of power for a project like this while remaining lightweight
and easy to control — especially helpful for beginners.
Amazon Product Suggestion:
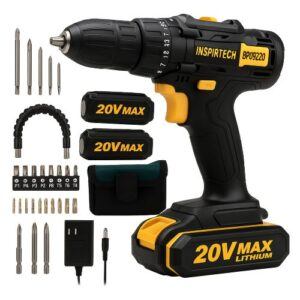
INSPIRITECH 20V Cordless Drill
(My Personal Choice!)
This is the cordless drill I use in my own shop, and it’s been rock-solid. The INSPIRITECH 20V kit includes two batteries, a charger, drill/driver bits, a flexible extension, and a handy tool bag. With 24 torque settings and a comfortable grip, it’s perfect for mailbox builds, repairs, and everyday woodworking.
Why it’s great:
Two 20V batteries — work nonstop
Includes bits, extension, and tool bag
Lightweight and easy to control
Strong enough for outdoor projects
Affordable, complete starter kit
🪚 SKIL 6-Amp Corded Jig Saw
When it comes time to cut stool parts to shape, a jigsaw is a safe and versatile option.
This SKIL corded jigsaw handles straight and curved cuts with ease,
making it ideal for breaking down boards and shaping smaller furniture pieces.
Amazon Product Suggestion:
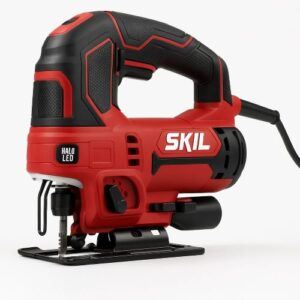
SKIL 6-Amp Corded Jig Saw
A dependable jigsaw with solid power and smooth control. The SKIL 6-Amp delivers clean curves, fast cuts, and easy bevel adjustments, making it a great all-around tool for woodworking and DIY projects.
Why it’s great:
Powerful 6-amp motor for hardwoods and plywood
4-stage orbital action for smooth or aggressive cutting
Bright HALO LED for clear visibility on cut lines
Tool-free bevel adjustment for quick angled cuts
Comfortable grip with low vibration for better accuracy
🪵 SKIL 5” Random Orbital Sander (with Cyclonic Dust Box)
A smooth finish isn’t just about looks — it’s also about safety.
A random orbital sander helps remove rough edges and splinters, and this SKIL model keeps sanding dust under control while leaving the stool comfortable and kid-friendly.
Amazon Product Suggestion:
SKIL 5” Random Orbital Sander
(with Cyclonic Dust Box)
This SKIL 5” random-orbital sander is a killer little powerhouse — perfect for smoothing out your walnut display case, taking down glue squeeze-out, or prepping panels before finishing.
It’s compact, strong, and stupid-easy to control.
The built-in cyclonic dust box actually works (rare for budget sanders),
keeping the air cleaner while you work.
Why it’s great:
Random-orbit finish for smooth, swirl-free sanding
Cyclonic dust box that actually traps dust
Comfortable grip for long sanding sessions
Variable speed for precise control on any wood
Low vibration for accuracy and less fatigue
🪚 Step-By-Step: How to Build a Kid’s Stool
With your tools ready and materials cut to size, it’s time to start building.
This project is broken down into five simple steps to keep things manageable and safe,
even if this is one of your first woodworking builds.
Take your time with each step, focus on accuracy, and you’ll end up with a sturdy,
kid-friendly stool that’s built to last.
🧰 Step 1: Measure and Mark Your Parts
Start by carefully measuring and marking all the stool components, including the top, sides, and supports. Double-check your measurements before making any cuts —
Accuracy here makes every step that follows easier and helps ensure the stool sits level and stable.
👉👉 Pro Tip: Measure twice and mark clearly.
Clean layout lines reduce mistakes and save time later.
🪚 Step 2: Cut the Stool Pieces to Size
Using your jigsaw, cut each piece along the marked lines. Keep the saw steady and let the blade do the work to avoid rough edges or uneven cuts. If your design includes curved edges or handholds, take your time shaping them smoothly.
👉👉 Pro Tip: Cut just outside your line, then sand to the final shape for cleaner results.
🔩 Step 3: Assemble the Frame
Begin assembling the stool by attaching the side panels and internal supports. Pre-drill screw holes to prevent splitting, then secure the pieces with screws while holding everything in place with clamps. Check for square as you go to keep the stool aligned.
👉👉 Pro Tip: Clamps are your best friend here —
they keep parts from shifting while you drill and fasten.
🪑 Step 4: Attach the Stool Top
Once the frame is solid, position the stool top and fasten it securely. Make sure it’s centered and flush before driving in the screws. This step ties the entire structure together and adds rigidity.
👉👉 Pro Tip: Countersink your screws slightly so the surface stays smooth and safe for little hands.
🪵 Step 5: Sand and Smooth All Surfaces
Finish by sanding every surface, edge, and corner of the stool. Start with a medium grit to remove rough spots, then switch to a finer grit for a smooth, splinter-free finish. This step is especially important for safety and comfort.
👉👉 Pro Tip: Pay extra attention to edges and corners —
softening them makes the stool safer for kids.
✅ Final Check
Give the stool a quick inspection to make sure all screws are tight and the stool sits flat on the floor.
Once everything feels solid, your kid’s stool is ready to use or finish with paint or a clear protective coat.
⚠️ Common Mistakes to Avoid
-
Skipping pre-drilling. Driving screws without pilot holes can split the wood and weaken the stool. Take the extra minute to drill first.
-
Rushing measurements. Small measuring errors add up quickly and can leave the stool uneven or wobbly. Double-check everything before cutting.
-
Over-tightening screws. Cranking screws too hard can strip holes or crack wood. Snug is enough.
-
Not sanding enough. Rough edges and sharp corners aren’t kid-friendly. Spend extra time smoothing every surface.
-
Forgetting to check stability. Always test the stool on a flat surface before use and tighten anything that feels loose.
🪚 Final Thoughts…
Building a kid’s stool is a simple project that delivers real results —
A useful piece, improved skills, and confidence at the workbench.
By keeping the design straightforward and focusing on accuracy, you can create a sturdy stool without complicated joinery or a long tool list.
Projects like this are a great reminder that woodworking doesn’t have to be complex to be rewarding. Take your time, enjoy the process, and use what you learn here as a foundation for future builds.
 More Woodworking Projects You’ll Enjoy
Here are a few other beginner-friendly project ideas you can try next:
-
How to Build a Wooden Mailbox – A sturdy outdoor project that teaches accurate layout and assembly.
-
Build a Simple Wooden Toolbox – A classic beginner project and a great way to organize your tools.
-
DIY Display Case – Learn clean joinery with a project that looks great in any room.
-
Craft a Kids’ Stool in 5 Steps – A quick build that teaches essential cutting and measuring skills.
These projects help you grow your skills while creating something you’ll enjoy for years to come.
You got this!
 Craft it. Shape it. Own it!
 Need More Woodworking Plans?
 Click here to learn more about Ted’s Woodworking Plans:
If you want hundreds of additional project ideas with clear step-by-step instructions, my full review breaks down exactly what you get inside Ted’s Woodworking Plans.
It’s a great resource if you like weekend builds, simple jigs, or classic shop projects.
Check out the full review here → Ted’s Woodworking Plans

 Turn Your Woodworking Passion Into Income
Click here to learn more about Wealthy Affiliate
SawdustSmarty started as a simple hobby.
It grew because I finally learned how to build a real website — the right way. If you’ve ever thought about turning woodworking into a side business or income stream, Wealthy Affiliate is the training I personally recommend.
Click here to read more → Wealthy Affiliate

I really enjoyed how detailed and beginner-friendly this guide was you made each step feel approachable while still emphasizing safety and durability. I like how you balanced practical tips with creative touches, especially the idea of personalizing the stool to make it special for the child. The non-slip grips suggestion is such a thoughtful addition for safety. Have you found that painted designs hold up well over time with heavy use, or is a stained finish generally more durable for kids’ furniture?
Thank you so much! I’m really glad the guide hit the right balance for you! Personalizing the stool is always one of my favorite parts, especially when it becomes something the child can feel proud of. Great question about the finish! In my experience, stained finishes tend to hold up better over time, especially with heavy, everyday use. Painted designs can still work well if sealed with a durable topcoat like polyurethane, but they might show chips or wear sooner… especially around the edges. If you’re aiming for longevity with a bit of flair, a stained base with painted accents sealed thoroughly can give you the best of both worlds!
Thanks again!
This post came at the perfect time!
I’ve been planning to order a 2-step stool for our 2-year-old, but my husband insists on building one himself since we already have tools like a jigsaw and a drill. After reading this, I’m starting to see his point—it actually looks doable and even fun! I love how you broke it down step by step without making it feel intimidating.
Do you think pine wood would hold up well for a toddler’s stool, or should we go for something sturdier like oak? Thanks again for this super helpful guide!
Thanks so much! I’m really glad the guide helped make the project feel approachable!!! Building something functional (and cute!) for your little one is such a rewarding project. Pine can definitely work for a toddler’s stool, especially if it’s thick enough and reinforced well, but if your kiddo is a climber or you want something super durable that’ll last for years, oak or maple would be great upgrades.
Either way, sounds like a fun weekend build with tools you already have — go team DIY’er!