
Adding felt lining to a jewelry box is one of the simplest ways to
make your project look clean, polished, and professional.
It not only improves the appearance
but also protects delicate items from scratches.
In this guide,
you’ll learn exactly how to line a jewelry box with felt step by step,
using simple tools and techniques that beginners can handle.
Why Add Felt Lining To A Jewelry Box?
Felt lining isn’t just about looks —
it adds real value to your build.
- Protects jewelry from scratches
- Gives a soft, finished interior
- Improves the overall presentation
- Makes your project feel higher quality
Even a basic box can look premium with a clean lining.
Materials You’ll Need
- Felt fabric (adhesive-backed or standard)
- Scissors or utility knife
- Ruler or measuring tape
- Pencil or chalk
- Spray adhesive or glue (if not using adhesive felt)
💡 Tip: Choose a color that contrasts nicely with your wood for a more professional look.
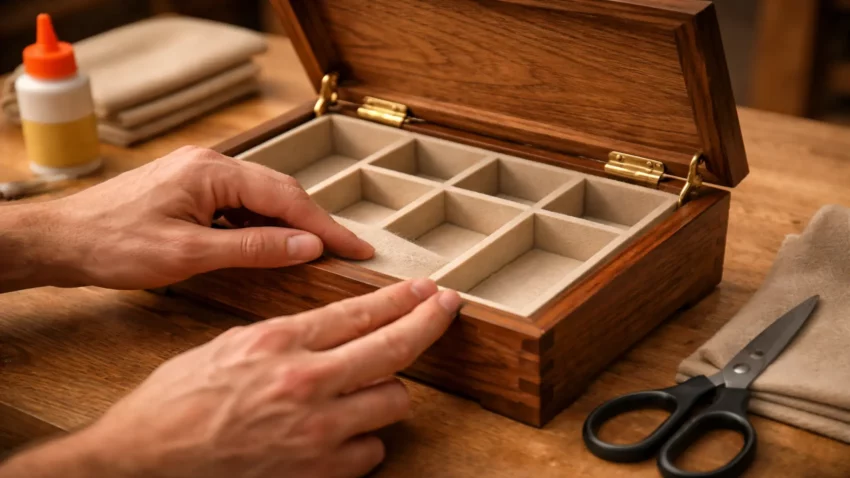
Step 1: Measure The Interior
Start by measuring the inside of your jewelry box carefully.
Measure:
- Bottom panel
- Side walls (if lining those as well)
- Any compartments or dividers
Write everything down before cutting.
Step 2: Cut The Felt To Size
Transfer your measurements onto the felt and cut slowly.
- Cut slightly smaller than exact size (about 1–2 mm)
- This prevents bunching and overlapping
- Keep edges straight and clean
Precision here makes a big difference later.
Step 3: Dry Fit Before Gluing
Before applying any adhesive:
- Place each piece inside the box
- Check for fit and alignment
- Make adjustments if needed
Never skip this step — it saves mistakes.
Step 4: Apply Adhesive
If using adhesive – backed felt:
- Peel backing slowly
- Position carefully before pressing
If using glue or spray adhesive:
- Apply a thin, even layer
- Avoid excess glue (it can seep through)
Step 5: Install The Felt
- Start with the bottom panel
- Press from the center outward
- Smooth out any bubbles or wrinkles
If lining sides:
- Apply after the bottom is set
- Align edges carefully for a clean look
Step 6: Press And Set
Once installed:
- Press firmly across all surfaces
- Let adhesive set fully before use
This helps ensure the felt stays in place long-term.
Tips For A Professional Finish
- Use sharp scissors for clean edges
- Work slowly — this isn’t a rushed step
- Match felt color to your wood tone
- Keep glue application light and even
Clean work here elevates your entire project.
Common Mistakes To Avoid
- Cutting pieces too large
- Rushing placement
- Using too much adhesive
- Skipping the dry fit step
Take your time — this is where detail matters most.
Optional Upgrades
Once you’ve mastered the basics,
you can take it further:
- Add padded sections for rings
- Create separate lined compartments
- Use velvet instead of felt for a premium look
These small upgrades can turn a simple box into a standout piece.
👉 Want to build the box first?
How To Make A Wooden Jewelry Box (Step-by-Step Guide + Plans)
Final Thoughts…
Lining a jewelry box with felt is a small step
that makes a big difference.
It adds protection, improves appearance,
and gives your project that finished, professional feel.
Take your time, focus on clean cuts and careful placement,
and you’ll end up with results that look far beyond beginner level.
🔨 Keep Improving Your Jewelry Box Skills
Ready to keep building? These guides will help you take your next step:
- 👉 Easy Jewelry Box Plans (Start your next build)
- 👉 Best Wood For Jewelry Boxes (Choose the right material)
- 👉 Jewelry Box Design Ideas (Upgrade your style and layout)
Keep building — each project gets better.
Come on man… You got this!
 Craft it. Shape it. Own it!