

If you’ve been itching to make something eye-catching without needing a full-blown furniture shop, DIY Wooden Wall Art Projects For Beginners are the perfect place to start.
These builds are simple, relaxing, and surprisingly impressive — the kind of projects that make people step into your home and say,
“Dang… you made that?”
Whether you love rustic forest scenes, geometric panels, layered shadow boxes, or farmhouse-style decor, wooden wall art lets you practice real woodworking skills on a small scale.
No complex joinery.
No giant tools taking over your workspace.
Just creativity, a little patience, and a few boards coming together to make something beautiful.
Let’s dive in and build some wall art that looks professional without feeling overwhelming —
even if you’re brand new to the craft.

🪵 Simple Wooden Wall Art Ideas You Can Build Today
Wooden wall art doesn’t have to be complicated to look amazing.
In fact, the best beginner projects are the ones that use just a few tools, a couple of boards, and a little creativity.
The goal here isn’t perfection — it’s learning, experimenting, and building confidence while making something that looks great on your wall.
Below are some beginner-friendly ideas you can start with.
Each one teaches a different woodworking skill without overwhelming you.
Pick one, grab a few pieces of wood, and let’s make something cool.
🧰 Tools You’ll Need For These Wall Art Projects
You don’t need a full workshop to make wooden wall art — just a few reliable tools you probably already have.
For most beginner wall art builds (including layered silhouettes like the forest scene), these three will carry the whole project:
• Tape Measure
For accurate layout, board sizing, and marking clean reference lines.
Good measurements = clean-looking art.
• Drill
Used for pilot holes, hanging hardware, and sometimes for starting interior cutouts if your design has tight curves.
• Jigsaw
The MVP for wall art. It handles curved cuts, silhouettes, patterns, and detailed shapes without needing a giant shop setup.
🌟 Amazon Product Suggestion:
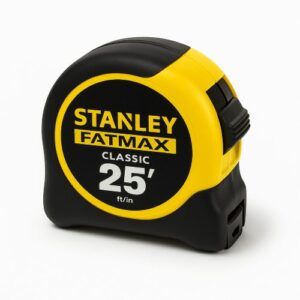
✔️ STANLEY FATMAX 25-Foot Tape Measure
A tough, reliable tape measure built for real job-site use. The STANLEY FATMAX 25′ delivers crisp easy-read markings, a strong standout, and the perfect length for woodworking and outdoor projects.
Why it’s great:
✔️ Heavy-duty, long-lasting construction
✔️ Easy-read numbers for quick measuring
✔️ 25-foot length covers indoor and outdoor builds
✔️ Smooth standout for measuring long boards solo
✔️ Trusted brand with thousands of great reviews
🌟 Amazon Product Suggestion:
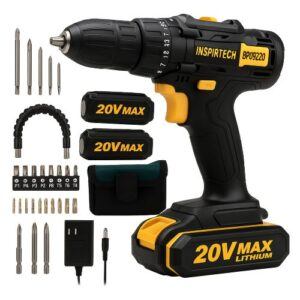
✔️ INSPIRITECH 20V Cordless Drill
(My Personal Choice!)
This is the cordless drill I use in my own shop, and it’s been rock-solid. The INSPIRITECH 20V kit includes two batteries, a charger, drill/driver bits, a flexible extension, and a handy tool bag. With 24 torque settings and a comfortable grip, it’s perfect for mailbox builds, repairs, and everyday woodworking.
Why it’s great:
✔️ Two 20V batteries — work nonstop
✔️ Includes bits, extension, and tool bag
✔️ Lightweight and easy to control
✔️ Strong enough for outdoor projects
✔️ Affordable, complete starter kit
🌟 Amazon Product Suggestion:

✔ SKIL 6-Amp Corded Jig Saw
A dependable jigsaw with solid power and smooth control. The SKIL 6-Amp delivers clean curves, fast cuts, and easy bevel adjustments, making it a great all-around tool for woodworking and DIY projects.
Why it’s great:
✔ Powerful 6-amp motor for hardwoods and plywood
✔ 4-stage orbital action for smooth or aggressive cutting
✔ Bright HALO LED for clear visibility on cut lines
✔ Tool-free bevel adjustment for quick angled cuts
✔ Comfortable grip with low vibration for better accuracy
Step 1: Choose Your Wall Art Design
Start by picking a design that matches your skill level and the look you’re going for.
Wooden wall art can be as simple or as detailed as you want — geometric patterns, rustic mountains, layered forest scenes, animals, initials, farmhouse signs, you name it.
Grab a pencil and sketch your layout, or print out a template you can trace onto your boards.
If you’re doing a layered project like the forest silhouette, break it into simple sections: foreground, mid-ground, and background.
This keeps the cutting process smooth and makes your finished piece look much more dimensional.
Before moving to the next step, double-check your measurements so your design fits your frame or mounting area.
A clean layout now saves a whole lot of frustration later.
👉👉 Pro Tip:
Print your design at the exact size you need so it fits your frame perfectly.
Step 2: Trace Your Design Onto the Wood
Place your printed design on top of the wood and secure it with a little tape so it doesn’t shift.
Use a sharp pencil to trace every line, curve, and outline.
If you’re making a layered piece, trace each layer separately so everything stacks clean later.
Keep the lines clear and easy to follow — this step sets the stage for smooth cutting in the next step.
👉👉 Pro Tip: Use blue painter’s tape under your paper template to reduce splintering when you cut.
Step 3: Cut Out Your Shapes With a Jigsaw
Clamp your board down and follow your traced lines slowly with the jigsaw.
Let the blade do the work — don’t force it.
|If your design has tight corners or curves, make small relief cuts to keep the blade from binding.
Work piece by piece if you’re doing a layered design so everything fits together smoothly later.
👉👉 Pro Tip: Use a fine-tooth jigsaw blade for cleaner cuts and less sanding.
Step 4: Lightly Sand Each Piece
Once your shapes are cut, give each one a quick sanding to remove fuzz, splinters, or rough edges.
You don’t need to go crazy here — just make the surfaces smooth enough to handle and ready for paint or stain.
A sanding block works great for flat areas, while rolled sandpaper makes curves easy.
👉👉 Pro Tip: Don’t over-sand the edges — a little crispness keeps your shapes looking sharp on the wall.
Step 5: Add Paint or Stain to Each Layer
Give each piece its own color or shade to create depth.
Darker tones work great for foreground shapes, while lighter tones make background layers pop.
Use a light hand — wall art looks best when the wood grain still shows through.
Let everything dry completely before you start assembling.
👉👉 Pro Tip: Test your color on a scrap piece first so you don’t ruin a finished cutout.
Step 6: Assemble the Layers
Start stacking your pieces in order, lining up the edges and shapes so the scene builds naturally from back to front.
Use small dots of wood glue to secure each layer — you don’t need much. Too much glue can squeeze out and make a mess.
Once everything is aligned, add a little weight on top and let it dry flat so your artwork stays perfectly straight.
👉👉 Pro Tip: Use thin spacers (like scrap popsicle sticks) between layers to add extra depth before gluing.
Step 7: Mount Your Art in a Frame
Place your finished layered design into a simple shadow-box frame or build a basic one from scrap boards. Make sure the backing sits tight so nothing shifts once it’s on the wall.
A snug frame makes even beginner projects look clean and professional.
Secure the back, add your hanging hardware, and you’re ready to show it off.
👉👉 Pro Tip: Use sawtooth hangers — they’re fast, easy, and perfect for lightweight wall art.
Step 8: Hang It Up and Enjoy the View
Pick a good spot on your wall, make sure it’s level, and hang your new creation proudly.
Wooden wall art always looks best with a little breathing room around it, so give it space to shine.
Step back and admire what you built — this is the fun part.
👉👉 Pro Tip: Use a 2-inch painter’s tape strip as a quick level guide for perfectly spaced nail holes.
Final Thoughts…
Wooden wall art is one of those projects that reminds you why woodworking is fun in the first place.
It’s creative, it’s simple, and it gives you something awesome to hang on the wall without spending days in the shop.
Projects like this let you play with layout, color, and grain patterns in a way that feels more like art than work — and that’s what makes them so satisfying.
With just a tape measure, drill, and jigsaw, you can turn a small stack of boards into something people will swear you bought at a craft market.
It’s a great weekend build, a perfect way to use up scrap wood, and one of those confidence-boosting projects that reminds you how far a little imagination can go.
Whether you hang it in your living room or give it as a handmade gift, this kind of project always gets attention — the good kind.
Now step back, look at that wall art, and enjoy the fact that you built that.
That’s the good stuff, brother.
 More Woodworking Projects You’ll Enjoy
Here are a few other beginner-friendly project ideas you can try next:
-
How to Build a Wooden Mailbox – A sturdy outdoor project that teaches accurate layout and assembly.
-
Build a Simple Wooden Toolbox – A classic beginner project and a great way to organize your tools.
-
DIY Display Case – Learn clean joinery with a project that looks great in any room.
-
Craft a Kids’ Stool in 5 Steps – A quick build that teaches essential cutting and measuring skills.
These projects help you grow your skills while creating something you’ll enjoy for years to come.
You got this!
 Craft it. Shape it. Own it!
 Need More Plans?
 Click here to learn more about Ted’s Woodworking Plans.
If you want access to hundreds of additional woodworking projects and detailed tutorials, check out my full review of Ted’s Woodworking Plans.
It’s packed with step-by-step builds that are perfect for weekend projects.

 Turn Your Woodworking Passion Into Income
Click here to learn more about Wealthy Affiliate.
SawdustSmarty.com started as a small hobby —
and it only grew once I finally learned how to build a real website.
If you’ve ever thought about turning woodworking into a side income, the training at Wealthy Affiliate is what I personally recommend.
