Building your first woodworking project doesn’t have to mean decorative fluff
or something that ends up forgotten on a shelf.
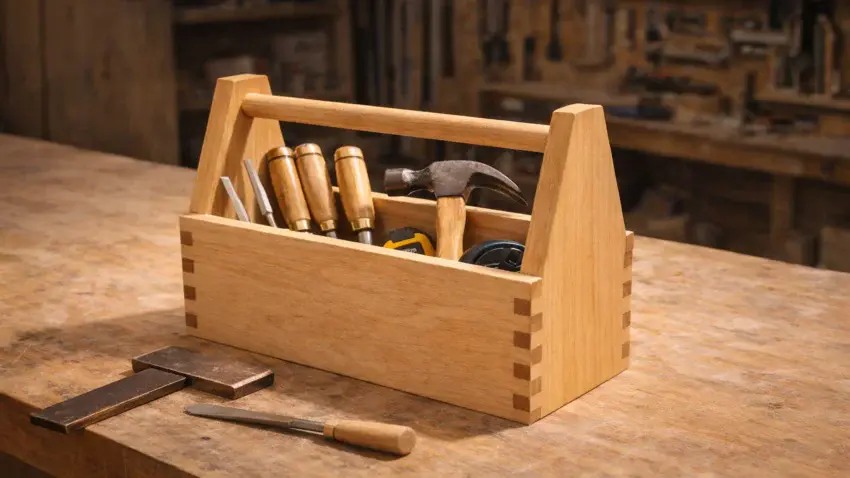
A wooden toolbox is one of the best beginner projects you can tackle in a single weekend —
because it teaches real skills and gives you something you’ll actually use
every time you step into the shop.
This isn’t a “craft.”
It’s a foundation project.
You don’t need a full shop, expensive tools,
or weeks of free time to build something solid and worthwhile.
If you’re looking for more
beginner woodworking projects you can realistically build in a weekend,
this toolbox is part of a larger collection of simple, confidence-building builds featured in our
Beginner Woodworking Projects You Can Build in a Weekend guide.
Why a Wooden Toolbox Is the Perfect Weekend Build
A toolbox hits the sweet spot between simple and skill-building.
In one project, you’ll practice:
-
Measuring and layout
-
Straight, accurate cuts
-
Basic joinery
-
Drilling and assembly
-
Sanding and finishing
And when you’re done, you’re holding a sturdy tool carrier that
immediately earns its place in your shop.
No gimmicks. No fancy materials. Just honest woodworking.
Tools & Materials You’ll Need
This project is beginner-friendly on purpose.
Basic tools are enough:
-
Hand saw or circular saw
-
Drill / driver
-
Square
-
Tape measure
-
Clamps (helpful, not mandatory)
-
Sandpaper or sanding block
Materials are simple:
-
A few boards of pine, poplar, or similar softwood
-
Wood glue
-
Screws or nails (depending on your build style)
If your goal is to build confidence without buying new tools, this project delivers.
What You’ll Learn From This Project
A wooden toolbox quietly teaches a lot.
You’ll learn how to:
-
Keep parts square during assembly
-
Build strong corners with basic joints
-
Align a handle cleanly and securely
-
Balance strength with clean looks
These skills transfer directly to bigger projects later —
shelves, boxes, cabinets, and beyond.
How Long It Takes (Realistically)
This is a true weekend project.
-
Day 1: Cut parts, assemble the box, install the handle
-
Day 2: Sand, soften edges, apply finish
You don’t need marathon shop sessions.
A few focused hours each day is plenty.
Customizing Your Toolbox
Once the basics are done, you can make it your own:
-
Add dividers for chisels or drivers
-
Change the handle shape
-
Adjust the size for your most-used tools
-
Leave it raw or apply a simple oil finish
This is where woodworking starts to feel personal.
Who This Project Is For
This toolbox is ideal if:
-
You’re new to woodworking
-
You want a fast win that builds confidence
-
You want something useful, not decorative
-
You’re short on time but serious about learning
If you can measure, cut, and drill — you can build this.
Final Thoughts…
A wooden toolbox may look simple,
but it does a lot of heavy lifting for a beginner.
It teaches real woodworking fundamentals, builds confidence fast,
and leaves you with something you’ll use every single time you step into the shop.
That combination is rare — and valuable.
One weekend.
One practical build.
Skills that carry forward.
And once this toolbox is finished,
you’ll already be thinking about what to build next —
which is exactly how a good woodworking journey begins.
 Craft it. Shape it. Own it!
 Need More Plans Or Ideas?
 Click here to learn more about Ted’s Woodworking Plans:
If you want access to hundreds of additional woodworking projects and detailed tutorials, check out my full review of Ted’s Woodworking Plans.
It’s packed with step-by-step builds that are perfect for weekend projects.

 Turn Your Woodworking Passion Into Income
Click here to learn more about Wealthy Affiliate
SawdustSmarty.com started as a small hobby — and grew because I finally learned how to build a real website.
If you’ve ever thought about turning woodworking into a side business or income stream, the training at Wealthy Affiliate is hands-down what I recommend.
