Building your first woodworking project doesn’t have to mean shelves, boxes,
or something purely practical.
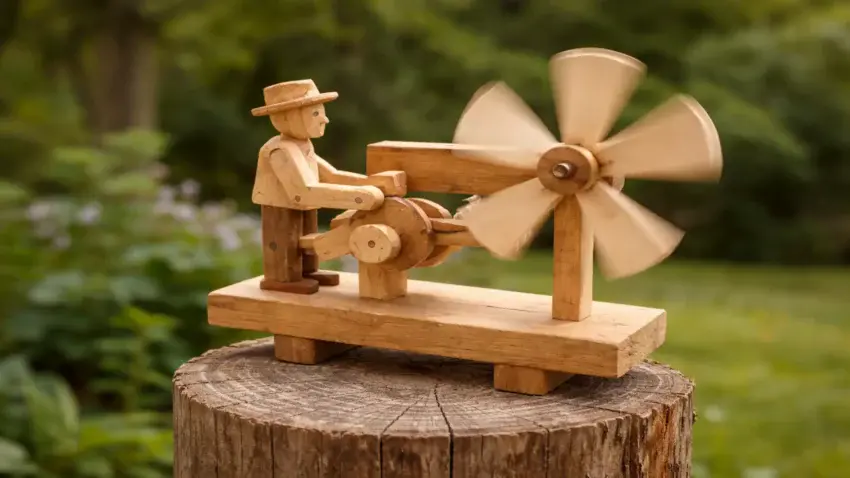
A wooden whirligig is different.
It’s a simple, mechanical project that teaches movement, balance, and layout —
while still being approachable enough to finish in a single weekend with basic tools.
This is the kind of project that reminds you why woodworking is fun.
Unlike static builds, a whirligig gives you immediate feedback.
When the wind hits it and everything spins smoothly, you know you built it right.
You don’t need a full shop, expensive tools,
or weeks of free time to build something solid and worthwhile.
If you’re looking for more
beginner woodworking projects you can realistically build in a weekend,
this toolbox is part of a larger collection of simple, confidence-building builds featured in our
Beginner Woodworking Projects You Can Build in a Weekend guide.
Why a Whirligig Is a Great Beginner Project
A wooden whirligig checks a lot of important beginner boxes:
-
It uses simple shapes and straightforward cuts
-
It introduces moving parts without complex mechanisms
-
It teaches alignment, balance, and spacing
-
It rewards careful layout and light sanding
-
And it ends with something playful you can actually enjoy watching
You don’t need a full shop, specialty jigs, or precision machinery.
Patience and attention matter far more than expensive tools.
Skills You’ll Build With This Project
This project quietly teaches several foundational skills
that carry over into future builds:
-
Accurate marking and layout
-
Drilling clean, centered holes
-
Light shaping and rounding edges
-
Understanding friction and clearance
-
Test-fitting parts before final assembly
You’ll also start thinking differently about movement in wood,
which is a skill many beginners don’t encounter early on.
Tools and Materials You’ll Need
Nothing fancy here.
Most whirligigs can be built with:
-
Scrap or softwood boards
-
A hand saw or small power saw
-
Drill and basic drill bits
-
Sandpaper or sanding block
-
Wood glue
-
Dowels, nails, or small rods for pivots
If you can build a small box, you already have the skill level needed for this project.
What Makes a Whirligig Work Smoothly
The secret to a good whirligig isn’t complexity —
it’s clearance and balance.
Parts need room to spin freely without rubbing.
Axles should be straight.
Paddles should be evenly spaced.
Small adjustments make a big difference.
This is a perfect project for learning how to slow down and test as you go,
instead of forcing pieces together.
Customizing Your Whirligig
Once the basic design works, customization is where the fun starts:
-
Change paddle shapes
-
Add figures or characters
-
Adjust size for faster or slower spin
-
Experiment with different woods
-
Leave it natural or add simple finishes
Each variation teaches you something new,
without starting over from scratch.
Final Thoughts…
A simple wooden whirligig is one of those projects that punches above its weight.
It’s small, approachable, and beginner-friendly —
but it introduces concepts that show up again and again in woodworking:
alignment, balance, movement, and patience.
If you’re new to woodworking or just want a quick, satisfying weekend build,
this is a project that delivers far more than it looks like on the surface.
 Craft it. Shape it. Own it!
 Need More Plans?
 Click here to learn more about Ted’s Woodworking Plans.
If you want access to hundreds of additional woodworking projects and detailed tutorials,
check out my full review of Ted’s Woodworking Plans.
It’s packed with step-by-step builds that are perfect for weekend projects.

 Turn Your Woodworking Passion Into Income
Click here to learn more about Wealthy Affiliate.
SawdustSmarty.com started as a small hobby —
and it only grew once I finally learned how to build a real website.
If you’ve ever thought about turning woodworking into a side income,
the training at Wealthy Affiliate is what I personally recommend.
