

How To Make Floating Shelves That Actually Stay Up isn’t just about clean lines and modern style —
It’s about building shelves that can handle real-world use without sagging, tilting, or ripping out of the wall.
While floating shelves look simple on the surface, the strength of the build comes down to
what’s hidden behind the drywall and how well the shelf itself is constructed.
In this step-by-step guide, you’ll learn exactly how to make floating shelves using proven structure, proper mounting techniques, and smart material choices so they stay solid for the long haul.
Whether you’re installing shelves in a kitchen, bathroom, or living space, this approach ensures your shelves look sharp, hold weight confidently, and actually stay up.

🛠️ The Right Tools to Build Shelves That Stay Up
Building floating shelves that actually stay up starts with having the right tools on hand.
You don’t need a full professional shop, but accurate measuring, solid cuts, and secure fastening all depend on using reliable tools.
The tools below will help you work precisely, mount your shelves correctly,
and avoid the common mistakes that lead to sagging or failure later on.
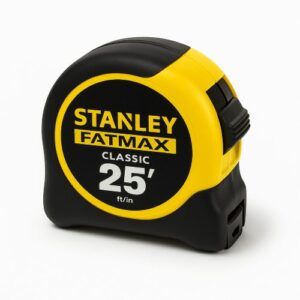
STANLEY FATMAX 25-Foot Tape Measure
Accurate measurements are critical when laying out floating shelves, especially when wall studs and bracket spacing need to line up perfectly.
The STANLEY FATMAX 25-Foot Tape Measure is durable, easy to read, and reliable enough for precise layout work every time.
 Amazon Product Suggestion:
 STANLEY FATMAX 25-Foot Tape Measure
A tough, reliable tape measure built for real job-site use. The STANLEY FATMAX 25′ delivers crisp easy-read markings, a strong standout, and the perfect length for woodworking and outdoor projects.
Why it’s great:
Heavy-duty, long-lasting construction
Easy-read numbers for quick measuring
25-foot length covers indoor and outdoor builds
Smooth standout for measuring long boards solo
Trusted brand with thousands of great reviews
INSPIRITECH 20V Cordless Drill
Amazon Product Suggestion:
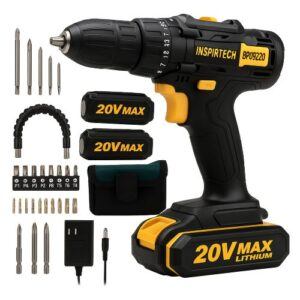
INSPIRITECH 20V Cordless Drill
(My Personal Choice!)
This is the cordless drill I use in my own shop, and it’s been rock-solid. The INSPIRITECH 20V kit includes two batteries, a charger, drill/driver bits, a flexible extension, and a handy tool bag. With 24 torque settings and a comfortable grip, it’s perfect for mailbox builds, repairs, and everyday woodworking.
Why it’s great:
Two 20V batteries — work nonstop
Includes bits, extension, and tool bag
Lightweight and easy to control
Strong enough for outdoor projects
Affordable, complete starter kit
SKIL 15-Amp 7-1/4″ Circular Saw
Amazon Product Suggestion:
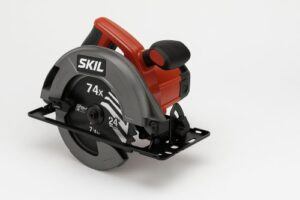
SKIL 15-Amp 7-1/4″ Circular Saw
(5280-01)
This SKIL saw is a solid, no-nonsense workhorse for cutting lumber.
The 15-amp motor gives you smooth, confident cuts, and the built-in laser helps keep your lines straight. It’s lightweight, easy to handle, and perfect for breaking down boards for a project like this porch bench.
Why It’s Great:
Strong 15-amp motor
Laser guide for straight cuts
Lightweight and beginner-friendly
Great for rip cuts and crosscuts
Excellent value for the price
🧰 Other Tools and Materials You’ll Need
Before you begin, gather these tools and materials:
Tools:
- Stud finder
- Level
- Wood glue
- Clamps
- Sandpaper or orbital sander
- Pocket hole jig (optional)
- Safety gear (glasses, mask)
Materials (per shelf):
- (1) 1×8 or 2×8 board (for shelf front and bottom face)
- (1) 1×2 or 2×2 furring strip (for hidden bracket)
- 3” wood screws
- Wall anchors (toggle bolts if no studs available)
- Wood stain or paint
- Polyurethane or topcoat
You can adjust the materials depending on your shelf dimensions,
but this guide is based on a 24″ wide by 7” deep shelf —
A common size for floating shelves.
🧱 What Makes a Shelf “Float”?
A floating shelf appears to hang on the wall with no visible brackets or supports.
The trick is to hide a support frame (also called a cleat or ledger) inside a hollow shelf box.
The support is either:
- Mounted to wall studs, or
- Secured with heavy-duty anchors if studs aren’t available.
When done right, this frame carries nearly all the weight, leaving the shelf itself clean and bracket-free.
✏️ Step 1: Decide on Shelf Size and Location
Before cutting anything, plan:
- How many shelves you want
- Spacing between shelves
- Overall width and depth
- What you plan to place on them (books? plants? kitchenware?)
Typical dimensions:
- Width: 18–36”
- Depth: 6–10”
- Thickness: 1.5–2.5”
👉👉 Pro Tip: Sketch out your design or tape it on the wall for a visual reference.
🪚 Step 2: Build the Shelf Box
Each shelf consists of two parts:
- The mounting frame (the hidden internal support)
- The shelf box (the visible outer casing)
Cut Your Wood:
- (1) Top piece: ¾” plywood or solid wood, cut to final shelf width/depth
- (1) Bottom piece: same size as top
- (1) Front face: cut from a 1×2 or 1×3 to match shelf width
- (2) Side pieces: optional if you want full box ends
Assembly:
- Use wood glue and brad nails or pocket holes to assemble the top, bottom, and front face into a hollow “U” shape.
- Sand all surfaces smooth and round over the edges slightly for a natural look.
- Leave the back open so the shelf can slide onto the mounting frame later.
You’ve now created the shell that gives your floating shelf its clean look.
🪛 Step 3: Build the Mounting Frame (Bracket)
This is the hidden support that will anchor into the wall.
How To:
- Cut a 2×2 or 1×2 to the same length as your shelf.
- Add (2–3) short perpendicular blocks (6” long) spaced evenly to form a T-shaped or fork-like support. This structure will support the shelf from the inside.
You should now have a sturdy wooden bracket that slides perfectly into the hollow shelf box.
🧱 Step 4: Find the Wall Studs
This is a make-or-break step!
- Use a stud finder to locate studs along your planned shelf location.
- Mark the centers of at least two studs.
- Use a level to draw a straight mounting line across the wall.
If no studs are available in the right spot, use toggle bolts or heavy-duty wall anchors — but shelves anchored into studs are always stronger and safer.
🔩 Step 5: Install the Mounting Frame
- Drill pilot holes in the wooden mounting frame at stud locations.
- Hold the frame level against the wall and drive 3” screws through the bracket into the studs.
- Make sure the frame is level and tight.
Now, give the bracket a wiggle. It should feel rock solid. If not — reinforce it.
This is the backbone of the shelf.
🧱 Step 6: Slide on and Secure the Shelf
- Slide the hollow shelf box onto the mounting bracket. It should fit snugly.
- Drill a few pilot holes from the top or bottom of the shelf into the bracket.
- Drive 1¼” screws to anchor the shelf to the bracket.
- Fill screw holes with wood filler or plugs if desired.
Now you’ve got a floating shelf that’s flush, level, and secure — no sagging or shifting.
🎨 Step 7: Sand, Stain, and Seal
- Sand the entire shelf smooth, using 120- and 220-grit sandpaper.
- Wipe away all dust with a tack cloth.
- Apply your chosen wood stain with a rag or brush.
- Once dry, seal with polyurethane or matte topcoat.
For a rustic look, try:
- Dark walnut or provincial stain
- Torch the edges lightly for a weathered finish
- Leave knots and small imperfections exposed
🧠 Tips for Shelf Strength and Stability
- Don’t make your shelves too deep — 8” is plenty for most items.
- Secure to at least 2 wall studs when possible.
- Avoid using drywall anchors for anything heavy.
- Reinforce longer shelves with extra center supports inside the shelf box.
- Keep shelf items evenly distributed — don’t overload one side.
👉👉 Pro Tip: A properly built and mounted floating shelf can easily support 25–50 pounds or more,
depending on materials and installation.
🪑 Where to Use Floating Shelves
Floating shelves are incredibly versatile. Here are a few placement ideas:
- Kitchen: Display mugs, bowls, or spice jars
- Bathroom: Store toiletries and decor above the toilet
- Living Room: Showcase books, plants, or art
- Home Office: Organize supplies or tech gear
- Bedroom: Replace bulky nightstands with floating shelves
They’re especially great in small spaces, helping you reduce clutter without bulky furniture.
🪵 Customization Ideas
Want to make your shelves stand out?
- Add LED strip lighting underneath
- Use live-edge slabs for a natural look
- Paint the shelf a bold color to contrast with your wall
- Use Shou Sugi Ban (burnt wood) for a charred, rustic texture
- Add a small lip edge to prevent items from sliding off
Floating shelves don’t have to be boring — they’re a blank canvas for creativity!
✅ Final Thoughts…
Floating shelves are one of the most practical and visually appealing projects you can build as a woodworker or DIYer.
With the right tools, solid construction, and proper installation, you can create shelves that are not only clean and modern but strong enough to hold real weight without worry.
Whether you’re upgrading a kitchen, organizing a bathroom, or adding character to a living space, well-built floating shelves deliver both form and function.
Take your time, build them right, and you’ll end up with shelves that look great, stay level, and hold up exactly the way they should.
 More Woodworking Projects You’ll Enjoy
Here are a few other beginner-friendly project ideas you can try next:
-
How to Build a Wooden Mailbox – A sturdy outdoor project that teaches accurate layout and assembly.
-
Build a Simple Wooden Toolbox – A classic beginner project and a great way to organize your tools.
-
DIY Display Case – Learn clean joinery with a project that looks great in any room.
-
Craft a Kids’ Stool in 5 Steps – A quick build that teaches essential cutting and measuring skills.
These projects help you grow your skills while creating something you’ll enjoy for years to come.
You got this!
 Craft it. Shape it. Own it!
 Need More Plans?
 Click here to learn more about Ted’s Woodworking Plans.
If you want access to hundreds of additional woodworking projects and detailed tutorials, check out my full review of Ted’s Woodworking Plans.
It’s packed with step-by-step builds that are perfect for weekend projects.

 Turn Your Woodworking Passion Into Income
Click here to learn more about Wealthy Affiliate.
SawdustSmarty.com started as a small hobby —
and it only grew once I finally learned how to build a real website.
If you’ve ever thought about turning woodworking into a side income, the training at Wealthy Affiliate is what I personally recommend.
