

Building your first birdhouse is one of the simplest (and most satisfying) ways to jump into woodworking, and that’s exactly what this guide — Build Your First Birdhouse: A Step-By-Step Guide — is here to help you do.
With just a few basic tools, a couple of small boards, and a free afternoon, you can create a cozy, safe home that invites chickadees, wrens, and other backyard favorites right into your yard.
A beginner-friendly project like this teaches you the essentials: measuring accurately, making clean cuts, pre-drilling holes, assembling panels, and adding the kind of small details that turn simple scraps of wood into something birds will actually use.
And the best part?
You don’t need a full workshop — just the right materials and a little guidance.
By the time you finish this tutorial, you’ll have a sturdy, weather-ready birdhouse and a better feel for the joy of hands-on building. Let’s get started.

Materials & Tools You’ll Need
Before you start cutting and assembling, here’s everything you’ll need to build a sturdy, beginner-friendly birdhouse. Nothing fancy — just basic tools and a couple of small boards.
Materials
-
Cedar or pine boards (around 1″ thick)
-
Exterior screws or nails (galvanized to resist rust)
-
Wood glue (optional, but adds strength)
-
Sandpaper (medium + fine grit)
-
Bird-safe exterior paint or stain
-
Pencil, square, and measuring tape for accurate layout
Tools
-
Hand saw, jigsaw, or circular saw (any will work for these cuts)
-
Drill with bits for holes and assembly
-
Screwdriver (manual or powered)
👉 Recommended Tools for This Project:
🌟 Amazon Product Suggestion:
✔️ STANLEY FATMAX 25-Foot Tape Measure
A tough, reliable tape measure built for real job-site use. The STANLEY FATMAX 25′ delivers crisp easy-read markings, a strong standout, and the perfect length for woodworking and outdoor projects.
Why it’s great:
✔️ Heavy-duty, long-lasting construction
✔️ Easy-read numbers for quick, accurate measuring
✔️ 25-foot length handles indoor and outdoor projects
✔️ Smooth standout with a trusted, well-reviewed brand
🌟 Amazon Product Suggestion:
✔️ IRWIN QUICK-GRIP 6” One-Handed Mini Bar Clamp Set
(4-Pack)
These IRWIN Quick-Grip clamps are my go-to shop workhorses. Light, fast, and truly one-handed, they’re perfect for small builds like display cases, shelves, frames, and trim. Even with their compact size, they deliver solid pressure, lock cleanly, release smooth, and won’t dent your walnut thanks to the non-marring pads. If you want clamps you’ll actually enjoy using — these are the ones.
Why it’s great:
✔️ One-handed operation for fast, effortless positioning
✔️ Strong, consistent grip with soft, non-marring pads
✔️ Lightweight design that won’t cause hand fatigue
✔️ Perfect for tight spots where full-size clamps won’t fit
🌟 Amazon Product Suggestion:
✔️ INSPIRITECH 20V Cordless Drill
(My Personal Choice!)
This is the cordless drill I use in my own shop, and it’s been rock-solid. The INSPIRITECH 20V kit includes two batteries, a charger, drill/driver bits, a flexible extension, and a handy tool bag. With 24 torque settings and a comfortable grip, it’s perfect for mailbox builds, repairs, and everyday woodworking.
Why it’s great:
✔️ Two 20V batteries — work nonstop
✔️ Includes bits, extension, and tool bag
✔️ Lightweight and easy to control
✔️ Strong enough for outdoor projects
✔️ Affordable, complete starter kit
✅ STEP-BY-STEP: How to Build Your First Birdhouse
Here’s a simple, beginner-friendly plan for a classic wooden birdhouse that works for most small backyard birds like wrens, chickadees, and bluebirds.
Follow each step and you’ll have a sturdy, weather-ready home in no time.
Step 1: Cut Your Wood Pieces
Start by measuring and cutting the pieces you’ll need:
-
Front & back panels: 8″ tall × 5″ wide
-
Side panels: 8″ tall × 4″ wide
-
Base: 4″ × 4″
-
Roof: about 7″ × 6″ with slight overhang
This gives you a balanced, reliable footprint that most small birds love.
👉👉 Pro Tip: Double-check every measurement before you cut. A measuring tape and square will save you from lopsided panels later.
Step 2: Drill the Entrance Hole
Drill a 1½-inch entrance hole centered about 6 inches from the bottom of the front panel.
This size works for wrens, chickadees, bluebirds, and similar small birds.
Don’t forget to drill 2–3 small drainage holes in the base to help water escape.
Step 3: Sand All Edges Smooth
Use medium-grit, then fine-grit sandpaper to round off sharp corners and smooth the entrance hole.
Clean edges protect birds from splinters and make the finished house look polished.
Step 4: Assemble the Birdhouse Body
Attach the front, back, and sides to the base using screws.
Add a thin line of wood glue along the joints for extra strength.
Make sure everything stays square — this keeps the roof sitting flat and prevents gaps.
Step 5: Add the Roof
Position the roof panel so it overhangs all sides slightly to help shed rainwater.
You can secure it two ways:
Option A: Screw it down permanently
Option B: Use removable screws or small hinges so you can clean the birdhouse each season
👉👉 Pro Tip: Hinged roofs make yearly cleanouts WAY easier — and birds are more likely to return to a clean house.
Step 6: Paint or Stain the Exterior
Choose a bird-safe, low-VOC exterior finish.
Natural colors blend in best and help keep predators away.
⚠️ Do NOT paint or stain the inside — chicks need natural wood for grip and safety.
Step 7: Mount Your Birdhouse
Place your birdhouse 5–10 feet above ground on a pole, post, or tree.
Tilt it forward just a touch so rain runs off and not into the entrance hole.
Pick a quiet spot with morning sun and an open flight path.
🐦 Beginner Birdhouse Kit (Great Alternative to Cutting Your Own Wood)
If you want to skip the lumber cutting and jump straight into assembly, this Beginner Birdhouse Kit is a solid choice.
It comes with pre-cut boards, a pre-drilled entrance hole, and all the screws you need —
perfect for first-timers, kids, or quick weekend builds.
Why It’s Great:
-
Pre-cut pieces save time and guarantee a proper fit
-
Entrance hole and ventilation already drilled
-
Makes a great project for families or beginners
-
Can be painted or stained just like a handmade build
-
Still teaches the basics of assembly and finish work
🌟 Amazon Product Suggestion:
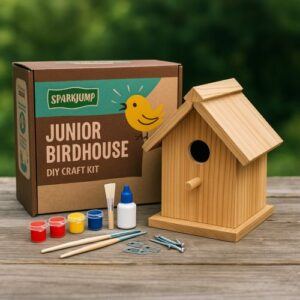
✔ SparkJump Jr Cedar Birdhouse Kit
(A Fun, Ready-to-Build Starter Kit!)
This is a great all-in-one kit if you want to skip lumber cutting and jump straight into a fun, easy build. The SparkJump Jr Birdhouse Kit comes with pre-cut cedar panels, a pre-drilled entrance hole, glue, nails, paint, brushes, and mounting hardware — everything you need in one box. It’s a perfect choice for beginners, kids, or anyone who wants a fast win without sacrificing quality.
With real cedar pieces and simple assembly, it still feels like real woodworking while giving you a no-stress project you can finish in under an hour.
Why it’s great:
✔ Pre-cut cedar pieces fit perfectly
✔ Includes paint, brushes, glue, and hardware
✔ Pre-drilled entry hole + proper ventilation
✔ Beginner-friendly for adults or kids
✔ Lets you customize the color and design
✔ Affordable, fun, and backyard-ready
Common Challenges & How to Avoid Them
Even though a birdhouse is a simple project, a few beginner mistakes can lead to poor results.
Here’s how to keep everything sturdy, safe, and bird friendly.
1. Getting the Entrance Hole Size Right
Different birds prefer different hole sizes:
-
1⅛″ → Chickadees, wrens
-
1½″ → Bluebirds, tree swallows
-
2″ → Larger species like nuthatches
👉👉Pro Tip: Use a spade bit or hole saw for clean, round openings that won’t splinter.
2. Preventing Water Leaks
A leaky birdhouse will stay empty. Make sure:
-
Panels are square and tight
-
Roof overhangs the sides
-
Base has drainage holes
A thin bead of wood glue helps seal gaps.
3. Keeping Predators Away
Skip adding perches — they help predators, not birds.
Use a pole baffle if mounting on a post, and add a metal hole guard if squirrels are a problem.
4. Planning for Easy Cleaning
A clean house attracts more nesting pairs each year.
Make the roof or one side removable so you can open the house at the end of the season.
✅ Extra Tips to Attract Birds to Your New Birdhouse
Once your birdhouse is built and mounted, a few small adjustments can make a big difference in how quickly birds move in.
Choose a Quiet Spot
Mount the house 5–10 feet off the ground in an area without heavy foot traffic.
Birds prefer calm, sheltered locations.
Face It Toward Morning Sun
Point the entrance east.
This gives gentle sunlight in the morning and avoids harsh afternoon heat.
Clear the Flight Path
Make sure branches, fences, or obstacles aren’t blocking the entrance.
Birds want a clean, straight approach.
Add Nearby Comforts
A shallow birdbath, native plants, or a small feeder nearby can help attract curious birds.
👉👉 Pro Tip: If you don’t see activity after a couple of weeks, try shifting the birdhouse to a slightly shadier or quieter area — tiny changes can make birds feel more comfortable.
✅ FAQ: Building & Maintaining Birdhouses
What’s the best wood for a birdhouse?
Cedar and pine are the top choices.
Cedar resists rot naturally, while pine is lightweight and easy to work with.
Avoid pressure-treated wood — the chemicals can harm birds.
Should I paint or stain my birdhouse?
Yes — but only the outside.
Use low-VOC, bird-safe exterior paint or stain.
Leave the interior natural for grip and ventilation.
How do I keep ants, wasps, or pests out?
Clean the birdhouse at the end of each nesting season.
You can also add a strip of mesh under the roof to discourage wasps from building inside.
How often should I clean it?
Once a year — usually in late fall or very early spring.
Remove old nesting material and rinse with plain water.
What hole size should I use for different birds?
-
1⅛″ → Chickadees, wrens
-
1½″ → Bluebirds
-
1¼″–2″ → Nuthatches, small woodpeckers
The entrance hole size is the biggest factor in which species you attract.
How can I keep predators away?
Use a metal hole guard, mount the house on a pole instead of a tree, and add a baffle to block climbing predators.
Avoid perches — they help predators more than birds.
Final Thoughts…
Building your first birdhouse is the perfect starter project — simple tools, easy cuts, and a finished build that actually makes a difference in your backyard.
With a few boards, a handful of screws, and a little patience, you’ve created a safe place for local birds to nest and raise their young. That’s something to be proud of.
What’s even better is how much you learn along the way: accurate measuring, cutting, drilling, assembly, and finishing.
These are the exact skills that roll straight into bigger woodworking builds as your confidence grows.
So, keep going.
Keep building.
Your next project — whether it’s a toolbox, a display case, or a full weekend build —
is already waiting on the workbench.
🪚 More Woodworking Projects You’ll Enjoy
Here are a few other beginner-friendly project ideas you can try next:
-
How to Build a Wooden Mailbox – A sturdy outdoor project that teaches accurate layout and assembly.
-
Build a Simple Wooden Toolbox – A classic beginner project and a great way to organize your tools.
-
DIY Display Case – Learn clean joinery with a project that looks great in any room.
-
Craft a Kids’ Stool in 5 Steps – A quick build that teaches essential cutting and measuring skills.
These projects help you grow your skills while creating something you’ll enjoy for years to come.
You got this!
⚒️ Craft it. Shape it. Own it! ⚒️
📐 Need More Plans?
👉👉 Click here to learn more about Ted’s Woodworking Plans.
If you want access to hundreds of additional woodworking projects and detailed tutorials, check out my full review of Ted’s Woodworking Plans.
It’s packed with step-by-step builds that are perfect for weekend projects.

💡 Turn Your Woodworking Passion Into Income
👉👉 Click here to learn more about Wealthy Affiliate.
SawdustSmarty.com started as a small hobby —
and it only grew once I finally learned how to build a real website.
If you’ve ever thought about turning woodworking into a side income, the training at Wealthy Affiliate is what I personally recommend.
