
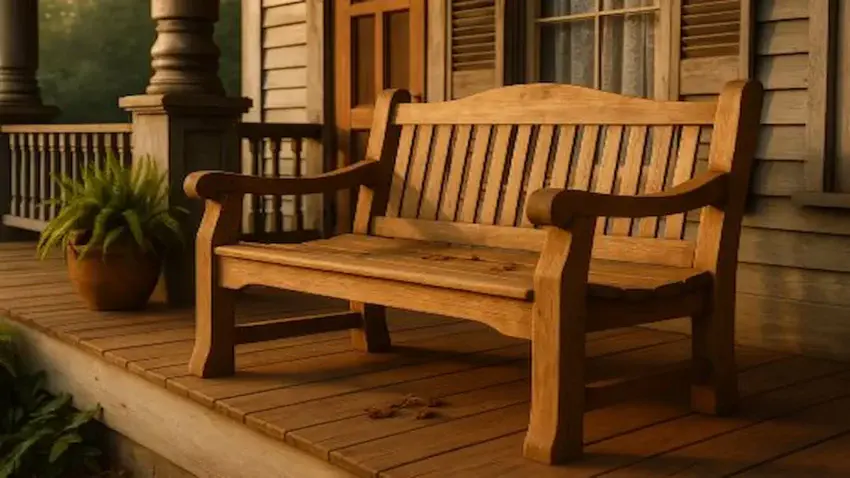
Building a rustic wooden porch bench is one of those woodworking projects that looks impressive but comes together with simple tools, patience, and a solid plan.
A bench like this adds instant charm to any porch or patio, giving you a comfortable place to sit, relax, and enjoy the view — and the best part is you can build it yourself.
In this guide, I’ll walk you through everything you need to create a sturdy, beautiful bench that feels right at home in any outdoor space.

🧰 Tools & Materials You’ll Need
Before you start cutting and assembling your rustic wooden porch bench, make sure you’ve got the right tools lined up.
This project doesn’t require anything fancy — just solid, reliable gear that helps you measure accurately, make clean cuts, and pull everything together square and sturdy.
Here’s what you’ll want on hand:
Tape Measure
A reliable tape measure is the backbone of any woodworking project, and building a porch bench is no different.
Accurate measurements keep your cuts clean, your angles true, and your final bench square and sturdy. Grab one with easy-to-read markings and a standout that won’t collapse on longer board measurements.
🌟 Amazon Product Suggestion:

✔️ STANLEY FATMAX 25-Foot Tape Measure
A tough, reliable tape measure built for real job-site use. The STANLEY FATMAX 25′ delivers crisp easy-read markings, a strong standout, and the perfect length for woodworking and outdoor projects.
Why it’s great:
✔️ Heavy-duty, long-lasting construction
✔️ Easy-read numbers for quick measuring
✔️ 25-foot length covers indoor and outdoor builds
✔️ Smooth standout for measuring long boards solo
✔️ Trusted brand with thousands of great reviews
Drill
From pre-drilling to driving screws into the frame, legs, and backrest, a good cordless drill keeps this build moving smoothly. Look for something with solid torque, a comfortable grip, and a quick-change chuck so you can jump between drill bits and drivers without missing a beat.
🌟 Amazon Product Suggestion:
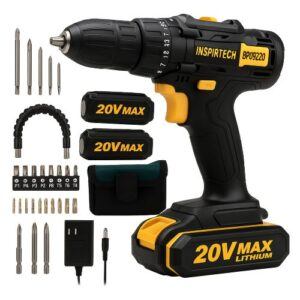
✔️ INSPIRITECH 20V Cordless Drill
(My Personal Choice!)
This is the cordless drill I use in my own shop, and it’s been rock-solid. The INSPIRITECH 20V kit includes two batteries, a charger, drill/driver bits, a flexible extension, and a handy tool bag. With 24 torque settings and a comfortable grip, it’s perfect for mailbox builds, repairs, and everyday woodworking.
Why it’s great:
✔️ Two 20V batteries — work nonstop
✔️ Includes bits, extension, and tool bag
✔️ Lightweight and easy to control
✔️ Strong enough for outdoor projects
✔️ Affordable, complete starter kit
SKIL Saw
A circular saw is the real workhorse of this project.
Whether you’re trimming seat boards, cutting legs to length, or ripping wider lumber down to size, a SKIL Saw delivers fast, accurate cuts without the bulk of a table saw.
It’s perfect for beginners and pros alike, making it a natural fit for this bench build.
🌟 Amazon Product Suggestion:

✔️ SKIL 15-Amp 7-1/4″ Circular Saw
(5280-01)
This SKIL saw is a solid, no-nonsense workhorse for cutting lumber.
The 15-amp motor gives you smooth, confident cuts, and the built-in laser helps keep your lines straight. It’s lightweight, easy to handle, and perfect for breaking down boards for a project like this porch bench.
Why It’s Great:
✔️Strong 15-amp motor
✔️Laser guide for straight cuts
✔️Lightweight and beginner-friendly
✔️Great for rip cuts and crosscuts
✔️Excellent value for the price
Let’s Build Your Porch Bench
Now that you’ve got the essentials lined up, it’s time to start cutting and assembling your wooden porch bench. This project comes together one clean step at a time — measure, cut, and assemble — and the process is beginner-friendly as long as you take it slow and stay accurate. Follow the steps below, and you’ll have a solid, beautiful bench ready for the porch in no time.
Step 1: Measure and Cut Your Bench Boards
Start by measuring and marking all your main bench pieces: the seat boards, the legs, the side supports, and the backrest slats.
A sharp pencil and a steady tape measure will keep everything accurate.
Once you’ve got your marks in place, use your SKIL Saw to make smooth, straight cuts.
Take your time here — clean cuts make the entire build go together easier.
👉👉 Pro Tip: Cut your longest boards first.
If you make a mistake, you can often trim the board down and use it for a shorter piece later.
Step 2: Assemble the Bench Frame
Lay out your cut pieces for the legs and side supports, then start assembling the main frame.
Use your drill to pre-drill screw holes — this keeps the wood from splitting and ensures the frame stays square during assembly.
Once everything lines up cleanly, drive your screws and lock the structure together.
👉👉 Pro Tip: Dry-fit the entire frame before drilling.
It’s the easiest way to spot alignment issues before you commit to screws.
Step 3: Attach the Seat Boards
With the frame assembled, begin laying your seat boards across the top.
Space them evenly, making sure each board overhangs the frame just slightly for a clean, comfortable edge.
Once everything looks right, pre-drill and secure each board with screws so the seat stays tight and stable over time.
👉👉 Pro Tip: Use a scrap piece of wood as a spacing block between boards.
It keeps your gaps perfectly consistent without eyeballing anything.
Step 4: Build and Attach the Backrest
Line up your backrest slats and position them against the rear legs so the top sits at a comfortable angle. Once you’re happy with the layout, attach the lower support rail first, then secure each slat one at a time. Keep everything straight and evenly spaced so the backrest feels solid and looks clean when you lean against it.
👉👉 Pro Tip: Clamp the first slat perfectly vertical before securing it.
Every slat after that will naturally follow its alignment.
Step 5: Install the Armrests
Position each armrest so it sits level from front to back and comfortably supports your forearm when seated.
Attach the front of the armrest to the top of the front leg, then secure the back of it to the upper frame or backrest post.
Make sure both sides match — uneven armrests stand out immediately.
👉👉 Pro Tip: Use a small level on top of each armrest before you screw it down.
A perfectly level armrest feels better and looks more professional.
Step 6: Add Extra Supports for Strength
To keep your bench rock-solid over time, add a couple of diagonal or horizontal support pieces beneath the seat and along the backrest.
These reinforcement strips prevent wobbling and help the bench handle more weight without flexing.
Cut them to fit snugly, then secure them with screws at each end.
👉👉 Pro Tip: Pre-drill every reinforcement piece.
Tight joints and clean screw holes make a huge difference in long-term durability.
Step 7: Sand All Surfaces Smooth
Once everything is assembled, go over the entire bench with your sander.
Start with a medium-grit paper to remove rough edges, then finish with a finer grit to get the wood smooth and splinter-free.
Pay extra attention to the armrests and seat edges — anywhere someone’s skin will touch.
👉👉 Pro Tip: Round over the front seat edge slightly as you sand.
It makes the bench far more comfortable to sit on for longer periods.
Step 8: Apply Your Finish
Choose a finish that fits the bench’s outdoor life — exterior stain, spar urethane, or an oil-based protector all work great.
Brush or wipe on your finish evenly, let it soak in or dry as directed, and then add additional coats for deeper color and better protection.
👉👉 Pro Tip: Lightly sand between coats with a fine grit pad.
It helps each layer bond smoothly and gives the final finish a pro-level feel.
Step 9: Attach the Bench to the Porch (Optional)
If your bench will live on a porch or deck and you want extra stability, you can secure it using small brackets or angled screws through the legs.
This keeps the bench from shifting, especially if it’s placed on slick boards or gets bumped around during heavy use.
👉👉 Pro Tip: Use exterior-rated screws if you anchor the bench.
Moisture can rust indoor screws fast, weakening the connection over time.
Step 10: Set It Up and Enjoy Your Work
Once your finish is fully dry, move the bench into its final spot and give it a test sit.
Check for any minor wobbles or edges that need a quick touch-up sanding.
Add a cushion or a couple of outdoor pillows if you want extra comfort — then sit back and enjoy the piece you built with your own two hands.
👉👉 Pro Tip: Put felt pads or rubber feet under the legs if your porch gets wet. It prevents moisture wicking and helps your bench last years longer.
Final Thoughts…
Building a rustic wooden porch bench is one of those projects that pays you back
every single time you sit down.
With a few basic tools and a little patience, you can create a sturdy,
comfortable piece that looks great on any porch or patio.
Whether you keep it simple or customize it with cushions, stain colors, or decorative touches,
this bench is a solid starter project that builds real woodworking confidence.
 More Woodworking Projects You’ll Enjoy
Here are a few other beginner-friendly project ideas you can try next:
-
How to Build a Wooden Mailbox – A sturdy outdoor project that teaches accurate layout and assembly.
-
Build a Simple Wooden Toolbox – A classic beginner project and a great way to organize your tools.
-
DIY Display Case – Learn clean joinery with a project that looks great in any room.
-
Craft a Kids’ Stool in 5 Steps – A quick build that teaches essential cutting and measuring skills.
These projects help you grow your skills while creating something you’ll enjoy for years to come.
You got this!
 Craft it. Shape it. Own it!
 Need More Plans?
 Click here to learn more about Ted’s Woodworking Plans.
If you want access to hundreds of additional woodworking projects and detailed tutorials, check out my full review of Ted’s Woodworking Plans.
It’s packed with step-by-step builds that are perfect for weekend projects.

 Turn Your Woodworking Passion Into Income
Click here to learn more about Wealthy Affiliate.
SawdustSmarty.com started as a small hobby —
and it only grew once I finally learned how to build a real website.
If you’ve ever thought about turning woodworking into a side income, the training at Wealthy Affiliate is what I personally recommend.
