
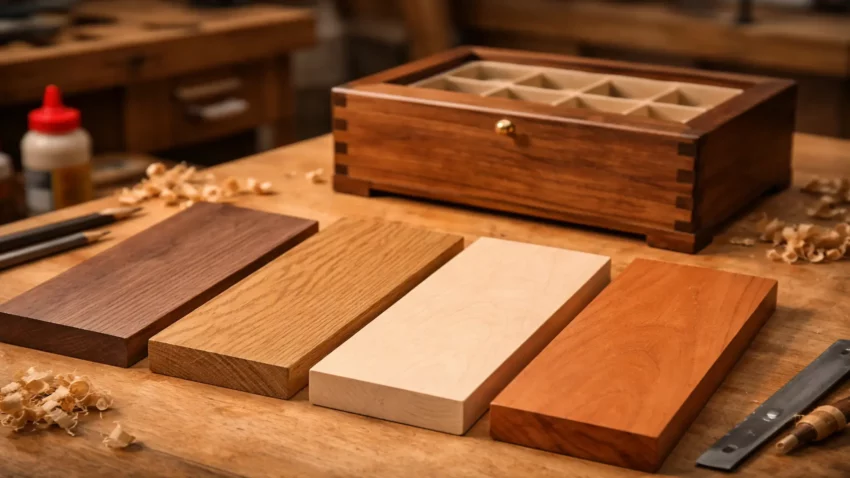
Choosing the right wood is one of the most
important decisions when building a jewelry box.
It affects not only how your project looks,
but also how well it holds up over time.
In this guide, you’ll learn
which wood types are best for jewelry boxes,
how they compare,
and what to choose based on your skill level and desired finish.
Why Wood Choice Matters
Not all wood behaves the same.
The type you choose will impact:
- How easy it is to cut and shape
- How well it holds joints and glue
- The final appearance and grain pattern
- Long-term durability
Choosing the right wood upfront makes the entire build smoother.
Best Wood Types For Jewelry Boxes
Here are the most popular and beginner-friendly options.
🪵 Pine (Best For Beginners)
Pine is one of the easiest woods to work with
and a great starting point.
Pros:
- Affordable
- Easy to cut and sand
- Widely available
Cons:
- Soft and dents easily
- Grain can look uneven with stain
👉 Best for: First builds and practice projects
🌲 Cedar (Naturally Protective)
Cedar has a natural aroma and
resists moisture and insects.
Pros:
- Smells great
- Naturally resistant to pests
- Lightweight
Cons:
- Softer than hardwoods
- Limited color options
👉 Best for: Functional storage boxes
🌳 Oak (Strong And Durable)
Oak is a popular hardwood known for
strength and classic grain.
Pros:
- Very durable
- Distinct, attractive grain
- Holds up well over time
Cons:
- Harder to cut than softwoods
- Heavier
👉 Best for: Long-lasting, traditional builds
🌰 Walnut (Premium Look)
Walnut is a favorite for
high-end woodworking projects.
Pros:
- Rich, dark color
- Smooth grain
- Finishes beautifully
Cons:
- More expensive
- Not as beginner-friendly to work
👉 Best for: Gift-quality or decorative boxes
🍁 Maple (Clean And Modern)
Maple offers a smooth, light-colored appearance.
Pros:
- Fine, even grain
- Strong and durable
- Great for modern designs
Cons:
- Harder to work than pine
- Can be difficult to stain evenly
👉 Best for: Clean, minimalist designs
Softwood vs Hardwood (What Should You Choose?)
If you’re just starting out:
- Softwoods (pine, cedar) → Easier to work with
- Hardwoods (oak, walnut, maple) → More durable and refined
👉 Simple rule:
Start with pine → upgrade as your skills improve
What Wood Should YOU Choose?
Here’s a quick guide:
- Beginner build: Pine
- Gift project: Walnut or maple
- Durability focus: Oak
- Aesthetic focus: Walnut
- Light, clean look: Maple
Choose based on your goal — not just what looks good.
Tips For Working With Jewelry Box Wood
- Always sand thoroughly before finishing
- Test stain on scrap pieces first
- Use sharp tools for cleaner cuts
- Avoid rushing the finishing process
Small details make a big difference in the final result.
Common Mistakes To Avoid
- Choosing wood that’s too hard for your skill level
- Skipping sanding between steps
- Applying stain unevenly
- Not accounting for wood movement
Take your time — good results come from patience.
Bringing It All Together
The best wood for your jewelry box depends on
your experience level and
what you want the final piece to look like.
Start simple, learn how different woods behave,
and upgrade as your skills improve.
The more you build,
the more confident your choices will become.
 Keep Building Your Jewelry Box Skills
If you want to take your jewelry box from basic to next-level,
these guides will help you dial it in:
 Easy Jewelry Box Plans (Simple builds you can finish fast)
- How To Line A Jewelry Box With Felt (Clean, professional finish)
- Jewelry Box Design Ideas (Upgrade your style and layout)
Keep building, keep improving — each project gets better.
Come on man… You got this!
 Craft it. Shape it. Own it!