

Building your own jewelry box is one of those woodworking projects that hits the sweet spot —
small enough to finish in a weekend but detailed enough to make you feel like a true craftsman.
Whether you want to create a keepsake for someone special or just sharpen your joinery skills, this project gives you a perfect mix of precision, creativity, and hands-on fun.
In this guide, I’ll walk you through every step so you can build a beautiful, sturdy jewelry box that looks great and lasts for years.

🧰 Tools & Materials You’ll Need
Before you start cutting, gluing, and assembling your jewelry box, make sure you’ve got the right tools on the bench. Having everything within reach keeps the build smooth, accurate, and frustration-free.
You’ll need:
-
Tape Measure
-
Clamps
-
Drill
-
Jigsaw
-
Sander
-
Wood Glue
-
Hinges & Small Screws
-
Fine-grit Sandpaper
-
Your choice of hardwood (oak, walnut, cherry, etc.)
🔧 Why These Tools Matter for This Project
A jewelry box might be small, but the details matter.
These three tools — a tape measure, a solid set of clamps, and a smooth-running sander — keep everything square, tight, and clean as you build.
Accurate measurements ensure your lid and base line up perfectly, clamps hold your pieces steady while the glue cures, and the sander gives you that silky-smooth finish that makes a jewelry box feel handcrafted instead of homemade.
🌟 Amazon Product Suggestion:

✔️ STANLEY FATMAX 25-Foot Tape Measure
A tough, reliable tape measure built for real job-site use. The STANLEY FATMAX 25′ delivers crisp easy-read markings, a strong standout, and the perfect length for woodworking and outdoor projects.
Why it’s great:
✔️ Heavy-duty, long-lasting construction
✔️ Easy-read numbers for quick measuring
✔️ 25-foot length covers indoor and outdoor builds
✔️ Smooth standout for measuring long boards solo
✔️ Trusted brand with thousands of great reviews
🌟 Amazon Product Suggestion:
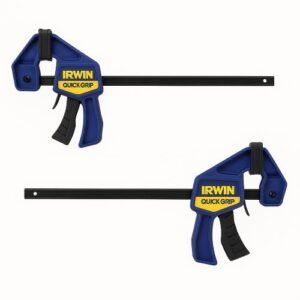
✔️ IRWIN QUICK-GRIP 6” One-Handed Mini Bar Clamp Set
(4-Pack)
These IRWIN Quick-Grip clamps are my go-to shop workhorses. Light, fast, and truly one-handed, they’re perfect for small builds like display cases, shelves, frames, and trim. Even with their compact size, they deliver solid pressure, lock cleanly, release smooth, and won’t dent your walnut thanks to the non-marring pads. If you want clamps you’ll actually enjoy using — these are the ones.
Why it’s great:
✔️One-handed operation makes positioning and clamping effortless
✔️Strong, consistent grip for small cabinet and display case build
✔️Soft, non-marring pads protect delicate woods like walnut and cherry
✔️Lightweight design lets you run several clamps at once without fatigue
✔️Perfect for tight spots where full-size bar clamps won’t fit
✔️Extremely reliable — no slipping, no bending, no cheap-plastic flex
✔️Great for beginners and pros who want fast, frustration-free clamping
🌟 Amazon Product Suggestion:
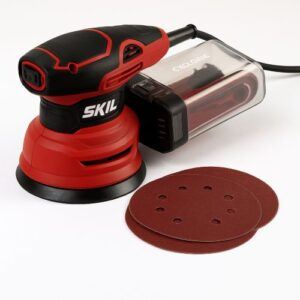
✔️ SKIL 5” Random Orbital Sander
(with Cyclonic Dust Box)
This SKIL 5” random-orbital sander is a killer little powerhouse — perfect for smoothing out your walnut display case, taking down glue squeeze-out, or prepping panels before finishing.
It’s compact, strong, and stupid-easy to control.
The built-in cyclonic dust box actually works (rare for budget sanders),
keeping the air cleaner while you work.
Why it’s great:
✔️ Random-orbit finish for smooth, swirl-free sanding
✔️Cyclonic dust box that actually traps dust
✔️Comfortable grip for long sanding sessions
✔️Variable speed for precise control on any wood
✔️Low vibration for accuracy and less fatigue
Step 1: Cut Your Box Panels to Size
Start by measuring and marking the pieces for your jewelry box — typically four sides, a bottom panel, and a lid.
Use your tape measure to keep everything consistent, then make your cuts with a jigsaw or whatever saw you prefer.
Accuracy matters here, because clean, matching cuts are what make the box sit square.
👉👉 PRO TIP:Cut all your side panels at the same time by stacking them and clamping them together. This keeps them identical and saves you from tiny gaps later on.
Step 2: Assemble the Box Frame
Dry-fit your side panels to make sure everything lines up cleanly. Once you’re happy with the fit, add a thin bead of wood glue to each joint and clamp the pieces together. Check for square before tightening everything down — a jewelry box only looks good if the corners are crisp and true.
👉👉 PRO TIP:Use a small machinist square or even a playing card as a quick spacer to ensure every corner stays perfectly 90° while the glue sets.
Step 3: Attach the Bottom Panel
Once the frame is dry and square, flip it upside down and place the bottom panel on top.
Apply a thin bead of glue around the inside edge of the frame, then set the panel in place.
Clamp lightly or use a few small brad nails to hold it until the glue cures.
This locks the whole structure together and gives your box a solid, durable base.
👉👉 PRO TIP: Lightly chamfer the inside edge of the bottom panel before installing it. This tiny bevel helps the panel seat cleanly without squeezing excess glue everywhere.
Step 4: Build and Fit the Lid
Measure the top opening of your box and cut a lid panel that overhangs the sides slightly — usually about 1/8″. Sand the edges smooth, then set it on the box to check the fit.
A well-fitted lid should sit flat without wobbling or binding.
👉👉 PRO TIP: If the lid rocks or sits uneven, lightly sand the high spots on the box rim instead of shaving material off the lid. It’s faster — and keeps your lid perfectly sized.
Step 5: Install the Hinges
Position your hinges on the back edge of the box and mark the screw holes.
Pre-drill tiny pilot holes to prevent splitting, then attach the hinges to the lid first.
Once those are secure, line the lid up on the box and fasten the other side of each hinge.
Open and close the lid a few times to make sure it moves freely without rubbing.
👉👉 PRO TIP: Put a thin business card or playing card under the lid while installing the hinges. This creates a perfect, even gap so the lid doesn’t bind when opening.
Step 6: Add Dividers or Interior Trays (Optional)
If you want your jewelry box to have compartments, now’s the time to build them.
Cut thin strips of wood to size and dry-fit them inside the box until you get the layout you like.
A dab of glue at the ends is usually enough to hold dividers in place.
For a lift-out tray, build a shallow mini-box that rests on small ledges glued inside the main box.
👉👉 PRO TIP: Use 1/8″ or 1/4″ stock for dividers—it keeps the interior looking clean and elegant without eating up space.
Step 7: Sand Everything Smooth
Now that your box is fully assembled, go over the entire piece with your sander and work through the grits. Start around 120 to level any joints, then move to 180 or 220 to get that silky finish.
Pay extra attention to the lid edges and corners — this is the part people notice first.
👉👉 PRO TIP: Run a quick fingertip pass along every edge after sanding. If it still feels sharp, hit it again with a light round-over. Softened edges make the box feel handcrafted and premium.
Step 8: Apply Your Finish
Choose a finish that matches the look you want — satin polyurethane for durability, Danish oil for a natural glow, or shellac for a classic warm tone.
Apply thin, even coats, letting each one dry fully before lightly sanding and adding the next.
A well-finished jewelry box should feel smooth as glass and look rich from every angle.
👉👉 PRO TIP: Wipe the wood with a slightly damp cloth before your first coat. This raises the grain so your final sanding leaves the surface extra smooth.
Step 9: Line the Interior (Optional but Highly Recommended)
A soft interior instantly makes your jewelry box feel high-end.
Cut fabric, felt, or velvet slightly larger than each compartment, then glue it down with spray adhesive or a thin coat of craft glue.
Smooth out wrinkles as you press it in place.
If you built a lift-out tray, line that too for a professional, finished look.
👉👉 PRO TIP: Stick your fabric to thin cardstock first, then place it inside the compartments. It keeps the fabric perfectly flat and makes the install clean and frustration-free.
Step 10: Add Hardware and Final Details
Finish your box with the little touches that make it stand out.
Install a small latch or decorative clasp on the front, add felt pads to the bottom corners, and double-check that the lid opens and closes smoothly.
These subtle details give your jewelry box that polished, professional look that people love to pick up and admire.
👉👉 PRO TIP: Test the lid movement after adding hardware. If it feels stiff, back the hinge screws out a quarter-turn — it often frees the lid instantly.
Final Thoughts…
Building a jewelry box is one of those projects that reminds you why woodworking is so addictive — it’s creative, precise, and gives you a finished piece that actually means something.
Whether you keep it for yourself or gift it to someone special, you now have the confidence
(and the process) to build a box that looks clean, opens smoothly, and feels handcrafted from top to bottom.
If you’re ready to keep leveling up your skills, check out these helpful guides next:
Craft it. Shape it. Own it!
🔧 Need More Plans?
👉👉 Click here to learn more about Ted’s Woodworking Plans:
If you want access to hundreds of additional woodworking projects and detailed tutorials, check out my full review of Ted’s Woodworking Plans.
It’s packed with step-by-step builds that are perfect for weekend projects.

💡 Turn Your Woodworking Passion Into Income
👉👉 Click here to learn more about Wealthy Affiliate
SawdustSmarty.com started as a small hobby — and grew because I finally learned how to build a real website.
If you’ve ever thought about turning woodworking into a side business or income stream, the training at Wealthy Affiliate is hands-down what I recommend.
