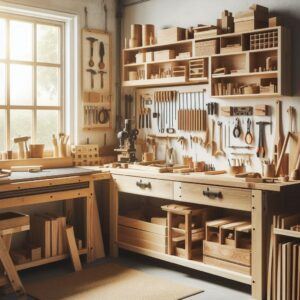
If you’ve ever found yourself tripping over cords, digging through piles of scrap wood, or spending more time looking for your tape measure than actually working — this one’s for you.
Whether you’re working out of a one-car garage, a shed, or a corner of the basement, a small woodshop doesn’t have to feel cramped or chaotic. With a bit of strategy and some elbow grease, you can transform your compact shop into an efficient, inspiring space where every tool has its place.
Why Organization Matters
Organization in a woodshop isn’t about being fancy — it’s about safety, workflow, and productivity. A tidy shop:
- Reduces tripping hazards
- Protects your tools and materials
- Speeds up your workflow
- Frees up mental space to focus on your craft
Let’s dive into how to make your small woodshop work smarter, not harder.
** Here’s a little transparency: Our website contains affiliate links. This means if you click and make a purchase, we may receive a small commission. Don’t worry, there’s no extra cost to you. It’s a simple way you can support our mission to bring you quality content.**
Step 1: Define Your Work Zones
One of the best ways to optimize a small space is to define zones for different types of work. This prevents overlap and makes tool storage more intuitive.
The Four Core Zones:
- Cutting Zone – Table saw, miter saw, track saw, etc.
- Assembly Zone – A sturdy workbench or flat surface.
- Sanding & Finishing Zone – Orbital sander, hand sanders, finish supplies, ventilation.
- Storage Zone – For lumber, hardware, jigs, and accessories.
Even if your space is tight, separating these areas as much as possible reduces clutter and improves your workflow.
Step 2: Maximize Vertical Space
In small shops, the walls are your best friend. Hanging tools vertically keeps your floor clear and everything within arm’s reach.
Vertical Storage Ideas:
- Pegboards for hand tools
- French cleat systems (highly customizable!)
- Wall-mounted shelves for paint, screws, glue, etc.
- Hanging cabinets or flip-up storage bins
Don’t forget to look up. Overhead storage racks can hold seasonal tools or bulk materials.
As an Amazon Associate, I earn from qualifying purchases.
Step 3: Go Mobile with Key Tools
Not every tool needs a permanent home. Mobile bases can make a massive difference in a compact shop.
Great candidates for mobile bases:
Roll them out when needed, then tuck them away when you’re done. You’ll instantly gain more floor space without sacrificing capability.
Step 4: Build Smart Workstations
Instead of having multiple bulky tables, consider multi-purpose workstations:
- Combine your table saw and outfeed table with storage drawers underneath.
- Add fold-down workbenches to free up space when not in use.
- Incorporate clamp storage into the sides of workbenches.
Every square inch of your shop should serve multiple purposes if possible.
Step 5: Keep Materials Neatly Stored
Scrap wood piles can get out of hand fast. They take up space, attract dust, and become a trip hazard.
Storage Tips:
- Use vertical lumber racks or wall-mounted brackets for longer boards.
- Keep short offcuts in labeled bins (and toss anything not worth saving).
- Dedicate a bin or drawer just for specialty woods and thin stock.
The less time you spend digging through piles, the more time you can spend building.
Step 6: Prioritize Dust Collection
Good dust collection isn’t just a luxury — it’s essential in a small space. Without it, your shop becomes a hazardous mess quickly.
Budget-Friendly Dust Collection Tips:
- Hook up a shop vac to your miter saw, sander, and router.
- Use blast gates and flexible hose to switch between tools.
- Consider a small cyclone separator to keep your vac filter clean.
- Invest in a quality air filter if you frequently sand indoors.
Cleaner air means better health and a lot less sweeping.
Step 7: Label Everything
Simple but powerful: label your drawers, bins, and toolboxes. It eliminates guessing games and speeds up your setup and clean-up.
Pro Tip:
Use painter’s tape and a Sharpie for easy-to-read, removable labels — perfect when you’re still experimenting with layout.
Step 8: Lighting & Power Layout
A dim shop is a dangerous shop. Make sure your layout includes good lighting over your main work areas.
- Overhead LED strips work great for general lighting.
- Task lights or clamp lights are perfect for close-up detail work.
- If you’re running extension cords across the floor, switch to overhead reels or wall-mounted outlets to reduce tripping hazards.
Good power layout = safer work + less frustration.
Step 9: Keep the Workflow Logical
Think about how a project flows through your shop:
- Pull materials from storage
- Break down boards with the miter/table/track saw
- Assemble parts on the bench
- Sand and finish
If your tools are arranged in this kind of logical sequence, you’ll move through your projects faster and with fewer mistakes.

Step 10: Maintain It Weekly
The best organizational system in the world won’t matter if it’s ignored. Spend just 15-20 minutes at the end of each week:
- Sweeping up
- Putting tools away
- Restocking supplies
- Tossing scrap you won’t use
Make it a habit, and your shop will stay in working order without much effort.
Final Thoughts
A well-organized small woodshop isn’t about having the latest gadgets or custom cabinetry. It’s about smart planning, clever storage, and consistent habits.
Once your shop is dialed in, you’ll feel the difference every time you step inside. You’ll stop tripping over cords and start tackling projects with more confidence — and probably a lot less cussing.


