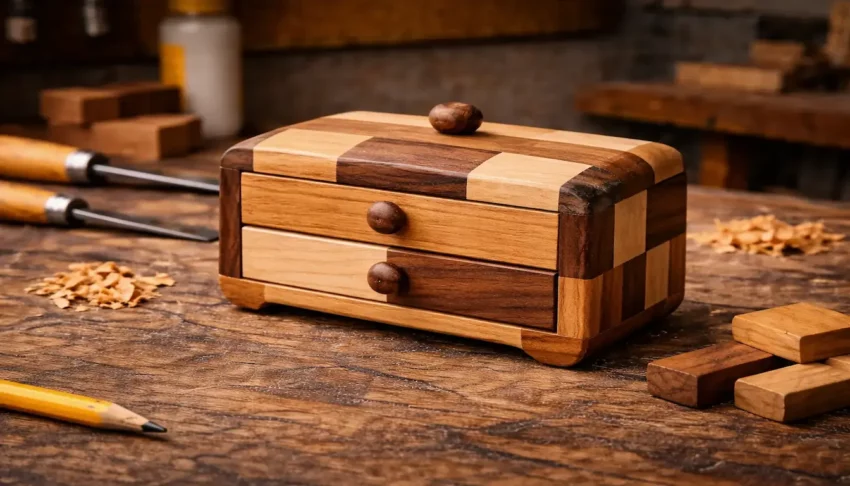
A wooden jewelry box is one of the most
practical handmade gifts a beginner woodworker can build.
The project is small, simple, and allows you to practice
important woodworking skills such as
cutting panels, sanding edges, and assembling small boxes.
Once finished,
a jewelry box makes a thoughtful handmade gift that can be used for many years.
👉 Looking for a more detailed step-by-step build?
How To Make A Wooden Jewelry Box (Step-by-Step Guide + Plans)
Why Wooden Jewelry Boxes Make Great Gifts
Handmade jewelry boxes are popular gift projects
because they are both useful and personal.
Benefits include:
✔ Small project that uses scrap wood
✔ Great practice for basic box construction
✔ Easy to customize with different wood types
✔ Perfect handmade gift for birthdays or holidays
Even simple designs can look beautiful when made from natural wood.
Materials You Can Use
A beginner jewelry box can be made using
small pieces of wood from previous projects.
Common wood choices include:
-
pine
-
maple
-
poplar
-
cedar
Thin plywood or hardwood panels are often used for the bottom of the box.
Basic Tools Needed
This project can be completed using simple woodworking tools:
-
hand saw or miter saw
-
wood glue
-
clamps
-
sandpaper
Optional tools like a router can be used to add decorative edges,
but they are not required.
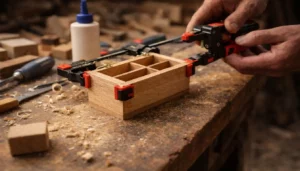
Simple Steps To Build A Wooden Jewelry Box
Most beginner jewelry boxes follow a straightforward building process.
1. Cut The Box Panels
Cut four side pieces and a bottom panel to form the box.
2. Glue And Clamp The Box
Glue the sides together and clamp them until the joints are secure.
3. Sand The Edges
Smooth all edges and surfaces using sandpaper.
4. Add A Lid
Attach a simple wooden lid or hinged top to complete the box.
Safety Tip
When making gift items, take extra time to sand all surfaces smooth
and remove any sharp edges.
This improves the appearance of the piece and makes the box more enjoyable to use.
👉 Looking for more handmade gift ideas?
Explore our guide to Beginner Wooden Gift Projects You Can Build In A Weekend.
Final Thoughts…
A wooden jewelry box is a simple woodworking project that
produces a meaningful and practical handmade gift.
Because the project is small and easy to build,
it’s a great way for beginners to practice box construction and finishing techniques.
With a little creativity, you can customize the box with different
wood types, finishes, or decorative details to create a truly personal gift.
Come on man… You got this!
 Craft it. Shape it. Own it!