
Scrap wood projects are a great way to turn leftover lumber
into something meaningful.
Even small offcuts can be transformed into practical or
decorative items with just a few basic tools.
A scrap wood picture frame is one of the most
satisfying beginner woodworking projects.
It allows you to practice measuring, cutting, and assembling
while creating something that can display photos, artwork, or memories.
Because the project uses small pieces of wood,
it can usually be completed in a single afternoon.
👉 Looking for more beginner builds?
Explore these scrap wood projects for beginners.
Quick Project Overview
| Project | Scrap Wood Picture Frame |
|---|---|
| Skill Level | Beginner |
| Build Time | 1–2 hours |
| Tools Needed | Saw, clamps, sandpaper |
| Materials | Scrap wood strips |
Materials Needed
This project uses small pieces of scrap wood that might otherwise be thrown away.
Materials:
-
scrap wood strips
-
wood glue
-
small nails or brads
-
sandpaper
-
picture backing and glass (optional)
Tools:
-
saw or miter saw
-
clamps
-
measuring tape
-
pencil
Because the materials are small and inexpensive,
this project is ideal for beginners.
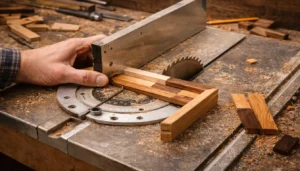
Step 1: Cut The Frame Pieces
Start by cutting four pieces of scrap wood to form the frame.
Each piece should be cut with 45-degree mitered corners
so the frame fits together neatly.
Measure carefully to ensure all sides align properly.
Step 2: Assemble The Frame
Apply wood glue to the mitered corners and join the pieces together.
Clamps can help hold the frame in place while the glue dries.
For extra strength, you can add small brad nails at the corners.
Step 3: Sand The Frame
Once the glue has dried, sand the entire frame to remove rough edges.
Start with medium grit sandpaper and finish with fine grit for a smooth surface.
This will also prepare the wood for finishing.
Step 4: Add Finish And Backing
Apply a wood finish if desired.
Common options include:
-
clear polyurethane
-
mineral oil
-
stain
After finishing, attach the picture backing and insert your photo or artwork.
Why Scrap Wood Frames Are Great Beginner Projects
Projects like this help beginners develop essential woodworking skills.
They allow you to practice:
-
accurate measuring
-
miter cuts
-
clamping and assembly
-
sanding and finishing
Even small scrap pieces can become meaningful handmade items.
Final Thoughts…
A scrap wood picture frame is a simple woodworking project that
transforms leftover lumber into something personal and decorative.
It’s quick to build, beginner friendly, and a great way to showcase photos
or artwork around your home.
Small builds like this help beginners gain confidence
while creating useful handmade items.
You got this!
 Craft it. Shape it. Own it!
 Need More Plans?
 Explore my full review of Ted’s Woodworking Plans to see what’s included.
If you’re looking for hundreds of additional woodworking projects and step-by-step tutorials,
take a look at my full review of Ted’s Woodworking Plans.
It’s packed with step-by-step builds that are perfect for weekend projects.
