Scrap wood projects are one of the best ways to turn leftover lumber into something useful.
Small pieces of wood that might otherwise be thrown away can often be
transformed into practical items for your home or workspace.
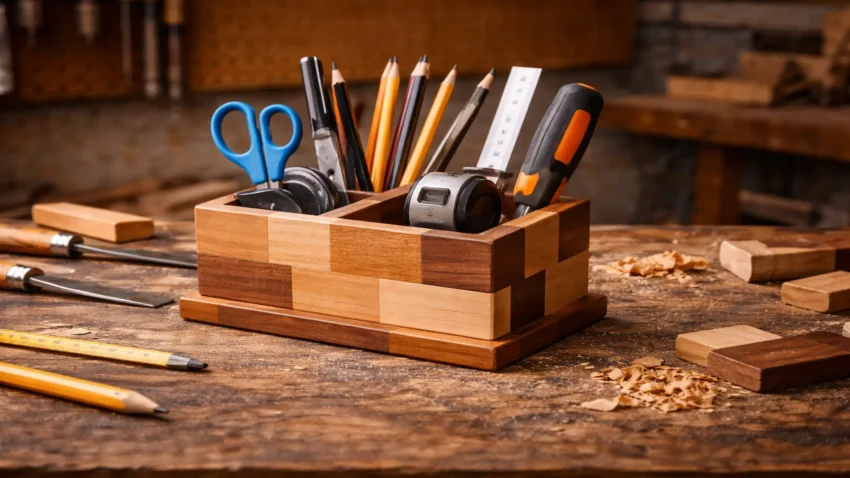
A scrap wood desk organizer is a perfect beginner woodworking project.
It helps keep your desk tidy while giving you an opportunity to practice
accurate cutting, drilling, and sanding.
Because the project uses only a few pieces of scrap wood,
it can usually be completed in less than an hour using basic tools.
👉 Looking for more ways to use leftover lumber?
Explore these scrap wood projects for beginners.
Quick Project Overview
| Project | Scrap Wood Desk Organizer |
|---|---|
| Skill Level | Beginner |
| Build Time | 45–90 minutes |
| Tools Needed | Saw, drill, sandpaper |
| Materials | Scrap wood pieces |
Materials Needed
This project requires only a few small pieces of scrap wood and basic woodworking tools.
Materials:
-
scrap wood blocks or boards
-
sandpaper
-
optional wood finish
Tools:
-
saw
-
drill with spade bit or Forstner bit
-
measuring tape
-
pencil
Because the organizer uses leftover lumber,
it’s an inexpensive project that works well for beginners.
Step 1: Cut The Scrap Wood Pieces
Begin by cutting your scrap wood pieces to the desired size for the organizer base.
Most desk organizers are about 6 to 10 inches wide,
depending on how many compartments you want.
Make sure the base is flat so the organizer sits securely on a desk or workbench.
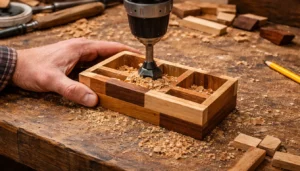
Step 2: Drill Compartments
Use a drill with a spade bit or Forstner bit to create holes for
pens, pencils, and small tools.
Space the holes evenly across the wood block.
These compartments can hold items such as:
-
pens
-
pencils
-
small screwdrivers
-
craft tools
Step 3: Sand The Organizer
After drilling the holes, sand the entire piece to remove rough edges.
Start with medium grit sandpaper and finish with fine grit to create a smooth surface.
Rounded edges will give the organizer a more finished appearance.
Step 4: Apply A Finish (Optional)
You can leave the organizer natural or apply a simple finish.
Common finishes include:
-
mineral oil
-
beeswax
-
clear polyurethane
A light finish will highlight the natural wood grain and protect the surface.
Why Scrap Wood Projects Are Useful
Projects like this desk organizer help beginners build woodworking skills
while creating something practical.
They allow you to practice:
-
measuring accurately
-
drilling clean holes
-
sanding smooth edges
-
applying simple finishes
Even small scrap pieces can become useful items for your workshop or office.
Final Thoughts…
A scrap wood desk organizer is a quick and satisfying woodworking project.
It turns leftover lumber into a useful item that helps keep your desk neat and organized.
Best of all, it can be completed in a short amount of time using basic tools.
Projects like this are a great way for beginners to practice woodworking skills
while making practical items for everyday use.
You got this!
 Craft it. Shape it. Own it!
 Need More Plans?
 Explore my full review of Ted’s Woodworking Plans to see what’s included.
If you’re looking for hundreds of additional woodworking projects and step-by-step tutorials,
take a look at my full review of Ted’s Woodworking Plans.
It’s packed with step-by-step builds that are perfect for weekend projects.
